Blog

  • 5 Creative Ways to Revamp Your Home on a Budget

    5 Creative Ways to Revamp Your Home on a Budget

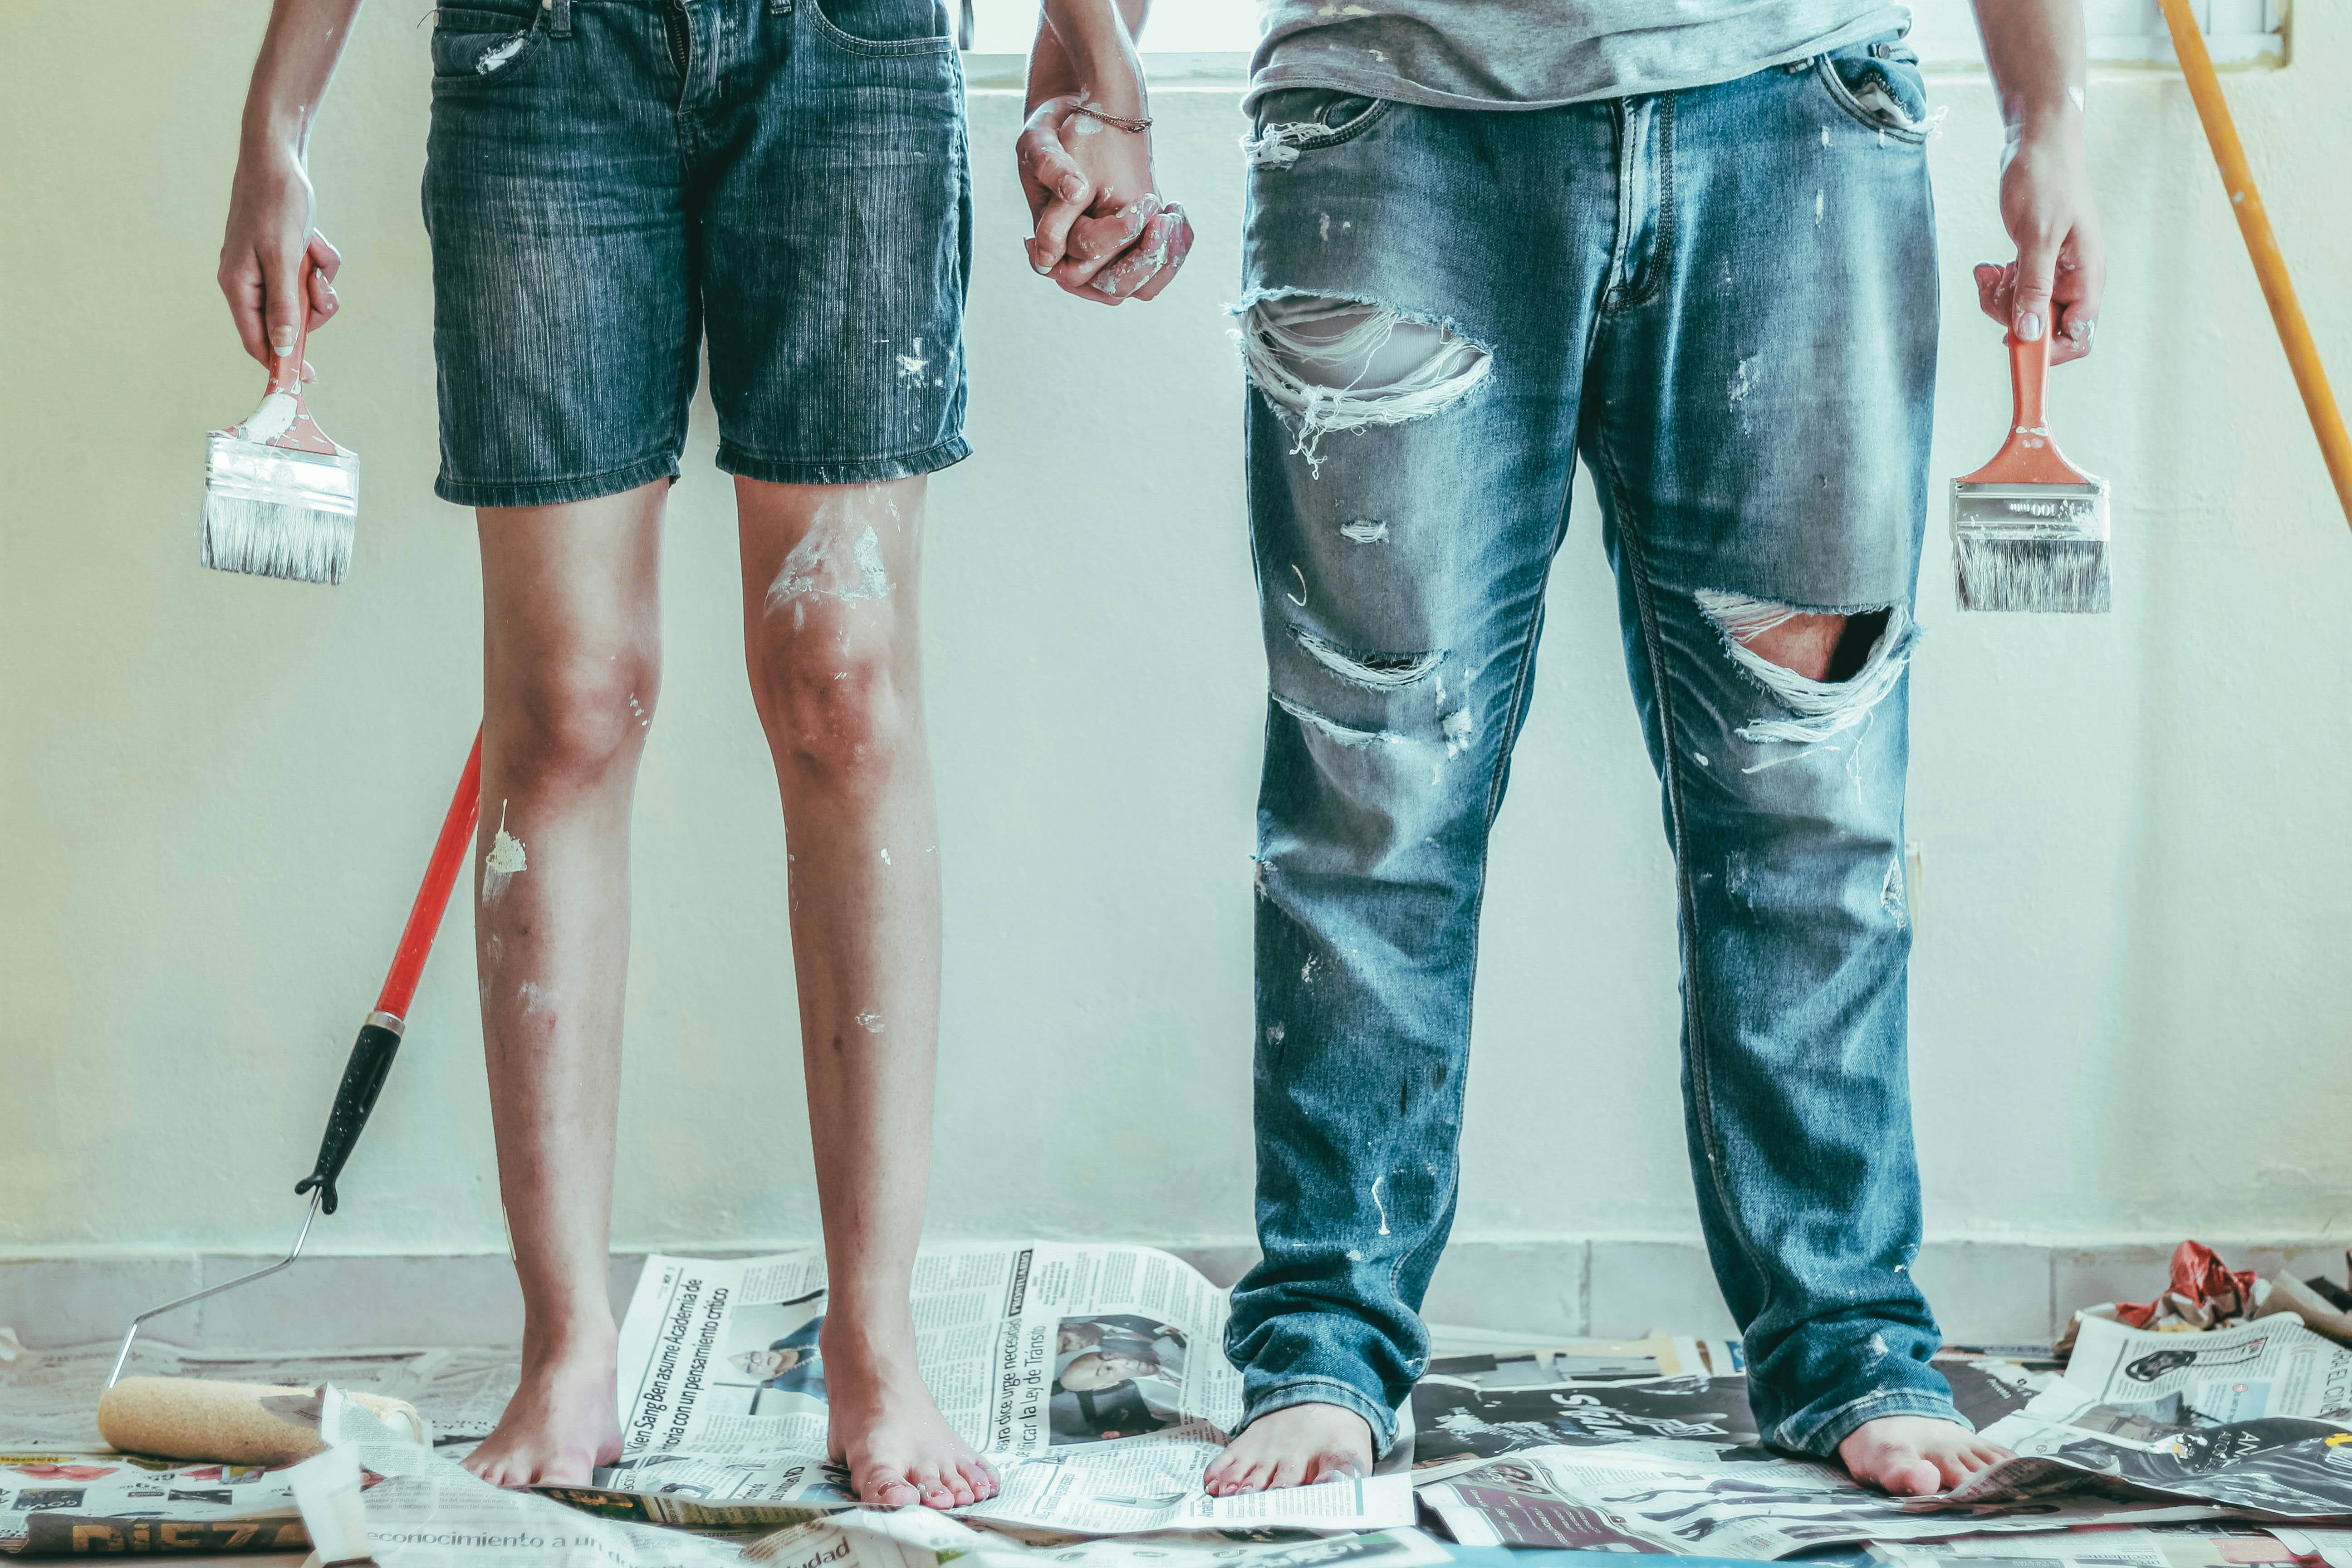
    When my partner and I moved in together two years ago, we were determined to make our new apartment a home. With limited funds for renovations, however, it seemed like an insurmountable task. We quickly realized that with some DIY renovations – and creativity! – we could transform our space into something special without breaking the bank.

    Upcycling furniture was one of the first tasks on our list – all it took was sanding down old chairs or tables, adding a coat of paint or varnish (in colors chosen to match!) and voila! Adding color with paint was also key; rather than investing money in expensive wallpapers or accessories we chose bright shades which made even small spaces feel bigger.

    We found repurposing old objects particularly satisfying as well; reclaimed wood became shelves while broken vases morphed into works of art when combined with colorful paints and fabrics from thrift stores around town – talk about being thrifty! Shopping tips came easy once you know what you’re looking for: vintage items can add character to any room at little cost if you do your research before buying anything.

    Finally Creative Decorating Solutions allowed us to truly personalize out space; using scarves as curtains not only added texture but saved us hundreds compared replacing existing window treatments entirely While these DIY Renovations may have taken more time then hiring professionals initially, both my partner ansd I are thrilled wiyh how much personality they’ve brought out.

    In this article, we’ll explore a few more creative, budget-friendly ways to revamp your home, from DIY improvement projects to smart shopping tips. So, let’s get started!

    1. Upcycling Furniture

    One of the most cost-effective ways to give your home a makeover is by upcycling furniture. Whether you shop at thrift stores or use items from around your house, DIY renovations can be done on any piece of furniture to bring it back to life and add some fun flair. Consider giving an old dresser a fresh coat of paint in bright colors or adding new hardware such as drawer pulls for an updated look. You could also repurpose larger pieces like entertainment centers into storage spaces with different compartments, perfect for decluttering any room. For more creative ideas like these, do some research online or ask friends who have experience with upcycling projects!

    If you’re looking for even easier ways to revamp the look and feel of your home without breaking the bank, why not start by adding color? Paint has incredible transformative power when used correctly – so pick out some shades that match your style and get ready to turn boring walls into bold statements!


    2. Redecorate Without Breaking the Bank

    Add a Fresh Coat of Paint

    A great way to add color and character to your home without breaking the bank is with paint. DIY renovations like painting walls, furniture or even accessories can instantly make a space feel more vibrant and inviting. Painting can also help create interesting visual elements that will draw attention away from any outdated features you may have in your home. If you’re feeling daring, use bright colors for an eye-catching effect, or stick with neutrals if you prefer something more subtle. Either way, adding color through paint is one of the most budget friendly ways to revamp any room in your house!

    When it comes time for cleaning up after painting projects don’t forget about all those old brushes and rollers—they still have lots of life left in them! Instead of throwing them out consider using them as decorative pieces around the house; just hang them on a wall or place inside frames for unique artwork ideas. Repurposing old objects isn’t just cost effective but eco-friendly too!

    Enhance Lighting

    Improving the lighting in your home can instantly make it feel more inviting and spacious. Swap out old, dated fixtures for more modern designs, and consider using energy-efficient LED bulbs to save on your electricity bill. Additionally, use floor lamps, table lamps, or string lights to create cozy, ambient lighting.

    Rearrange Your Furniture

    Sometimes, all it takes to revamp your home is rearranging the furniture. Play around with different layouts and find one that maximizes the available space and improves traffic flow. This simple change can make your home feel entirely new and won’t cost you a dime.

    Update Your Accessories

    Small changes like updating your accessories can make a big impact on your home’s overall appearance. Swap out old throw pillows, curtains, or area rugs for new, budget-friendly options. Shop for discounted items or make your own to add a personal touch to your space.

    Use Mirrors Strategically

    Mirrors are an affordable and versatile decorating tool. They can create the illusion of more space, reflect light, and add a touch of elegance to any room. Hang mirrors on walls opposite windows to maximize natural light or use them to create a statement piece, such as a gallery wall.

    Create a Gallery Wall

    A gallery wall is an excellent way to personalize your space without spending a fortune. Collect art prints, family photos, or even postcards and arrange them in a visually appealing pattern on your wall. Use thrift store frames or repurpose old ones to tie the look together.

    Add Removable Wallpaper or Decals

    Removable wallpaper and wall decals are a renter-friendly, budget-conscious way to add some flair to your walls. They come in various designs and colors, making it easy to find something that suits your style. Plus, they’re easy to remove when you’re ready for a change, so you won’t have to commit to a long-term design.


    3. Repurposing Old Objects

    One of the best ways to revamp your home on a budget is by repurposing old objects. Whether it’s an outdated end table, or simply some unused mason jars lying around, there are plenty of creative DIY renovations that can breathe new life into these items.

    For instance, you could take an old dresser and paint it in vibrant colors for a unique bedroom piece; add wheels to turn it into a rolling kitchen island; fill the drawers with plants for a fun planter display; or use glass tops to create custom tables throughout your home. Likewise, you could sand down wooden chairs and give them fresh coats of paint for outdoor seating areas or use empty jugs as vases for interesting flower arrangements. The possibilities truly are endless!

    Declutter and Organize

    A clutter-free, organized space instantly feels more inviting and refreshed. Set aside some time to declutter your home, donating or selling items you no longer need. Invest in affordable storage solutions, such as shelves or decorative baskets, to keep everything in its place.

    Invest in Multi-functional Furniture

    When working with a limited budget, it’s essential to make the most of your purchases. Look for multi-functional furniture that can serve multiple purposes, such as a sofa bed or a coffee table with built-in storage. This will save you money and help keep your space tidy and organized.

    With just a few small changes from time-to-time – all done on very minimal costs – repurposing existing materials can revolutionize any living space without breaking the bank. To find out more thrifty shopping tips so you can continue giving your house fresh updates whenever needed, be sure to read the next point on our list!


    4. Thrifty Shopping Tips

    For those looking to revamp their home without breaking the bank, there are DIY renovations and thrifty shopping tips that can help. One way to save money is by doing research online for discounts on furniture or appliances. Shopping around at local stores and taking advantage of sales events are other ways you can get quality items at a lower cost than retail price. Another option is visiting flea markets and secondhand shops, where you may find vintage or gently used pieces with a unique touch while still staying within your budget.

    When it comes time to do some work yourself, be sure not only to plan ahead but also prepare properly beforehand. This includes having all tools necessary such as saws, drills, hammers etc., making accurate measurements so materials fit correctly in the space available – being mindful of electricity outlets when painting walls – plus any other requirements for the job you want done right the first time round! With these helpful pointers in mind along with careful planning and preparation before starting any project; tackling DIY renovations doesn’t have to break your wallet – saving you from costly mistakes down the line too!

    Now that we’ve discussed how one might go about buying new furnishings or renovating existing ones through DIY projects let’s move onto creative decorating solutions which could add an extra special touch into your revamped home on a budget…


    5. Boost Curb Appeal

    Plant a Low-maintenance Garden

    A well-maintained garden can significantly enhance your home’s curb appeal. Opt for low-maintenance plants that are easy to care for and don’t require a lot of water or attention. This will save you both time and money in the long run.

    Update Your Front Door

    Your front door is one of the first things people see when they visit your home. Give it a fresh coat of paint or add a new, stylish doormat to make a strong first impression without spending much money.


    TL;DR

    Decorating your home on a budget doesn’t have to be as daunting as it may seem. Creative decorating solutions can help you revamp your home without breaking the bank. Upcycling furniture, adding color with paint, repurposing old objects and thrifty shopping tips can all help you create a fresh and vibrant look.

    Upcycling furniture is a great way to give old furniture a new look. You can transform an outdated piece of furniture into something fresh and stylish by repainting it or giving it a new stain. You can also use materials like fabric, wallpaper or decoupage to give it a unique look. Adding color with paint is another great way to transform your home without spending a lot of money. You can use paint to give your walls a new look, or you can use it to redo furniture or other accessories. Repurposing old objects is another way to create something unique and interesting. An old door can be turned into a unique headboard, and an old ladder can be turned into a shelving unit. Thrifty shopping tips can help you find great deals on furniture, home decor, and more. Online shopping, thrift stores, and flea markets are all great places to find unique pieces at a fraction of the cost.

    Finally, creative decorating solutions allow you to create a unique and beautiful home without breaking the bank. By using upcycling, painting, repurposing, and our thrifty shopping tips, you can revamp your home and create a space that is both stylish and affordable. With these tips, you can make your home look beautiful without spending a fortune.


    Frequently Asked Questions

    1. What are some affordable ways to update my home’s exterior? Painting your front door, adding new house numbers, or installing outdoor lighting can make a big difference in your home’s curb appeal without costing a lot of money.
    2. How can I make my home feel more spacious on a budget? Use mirrors to reflect light and create the illusion of more space, choose furniture with a smaller footprint, and keep clutter to a minimum.
    3. Where can I find inexpensive home décor items? Thrift stores, garage sales, flea markets, and discount stores are great places to find affordable home décor. Don’t forget to check for sales and clearance items at your favorite retailers, too.
    4. How can I save money on DIY home improvement projects? Look for deals on materials and tools, repurpose items you already have, and consider learning new skills through online tutorials to tackle projects yourself instead of hiring professionals.
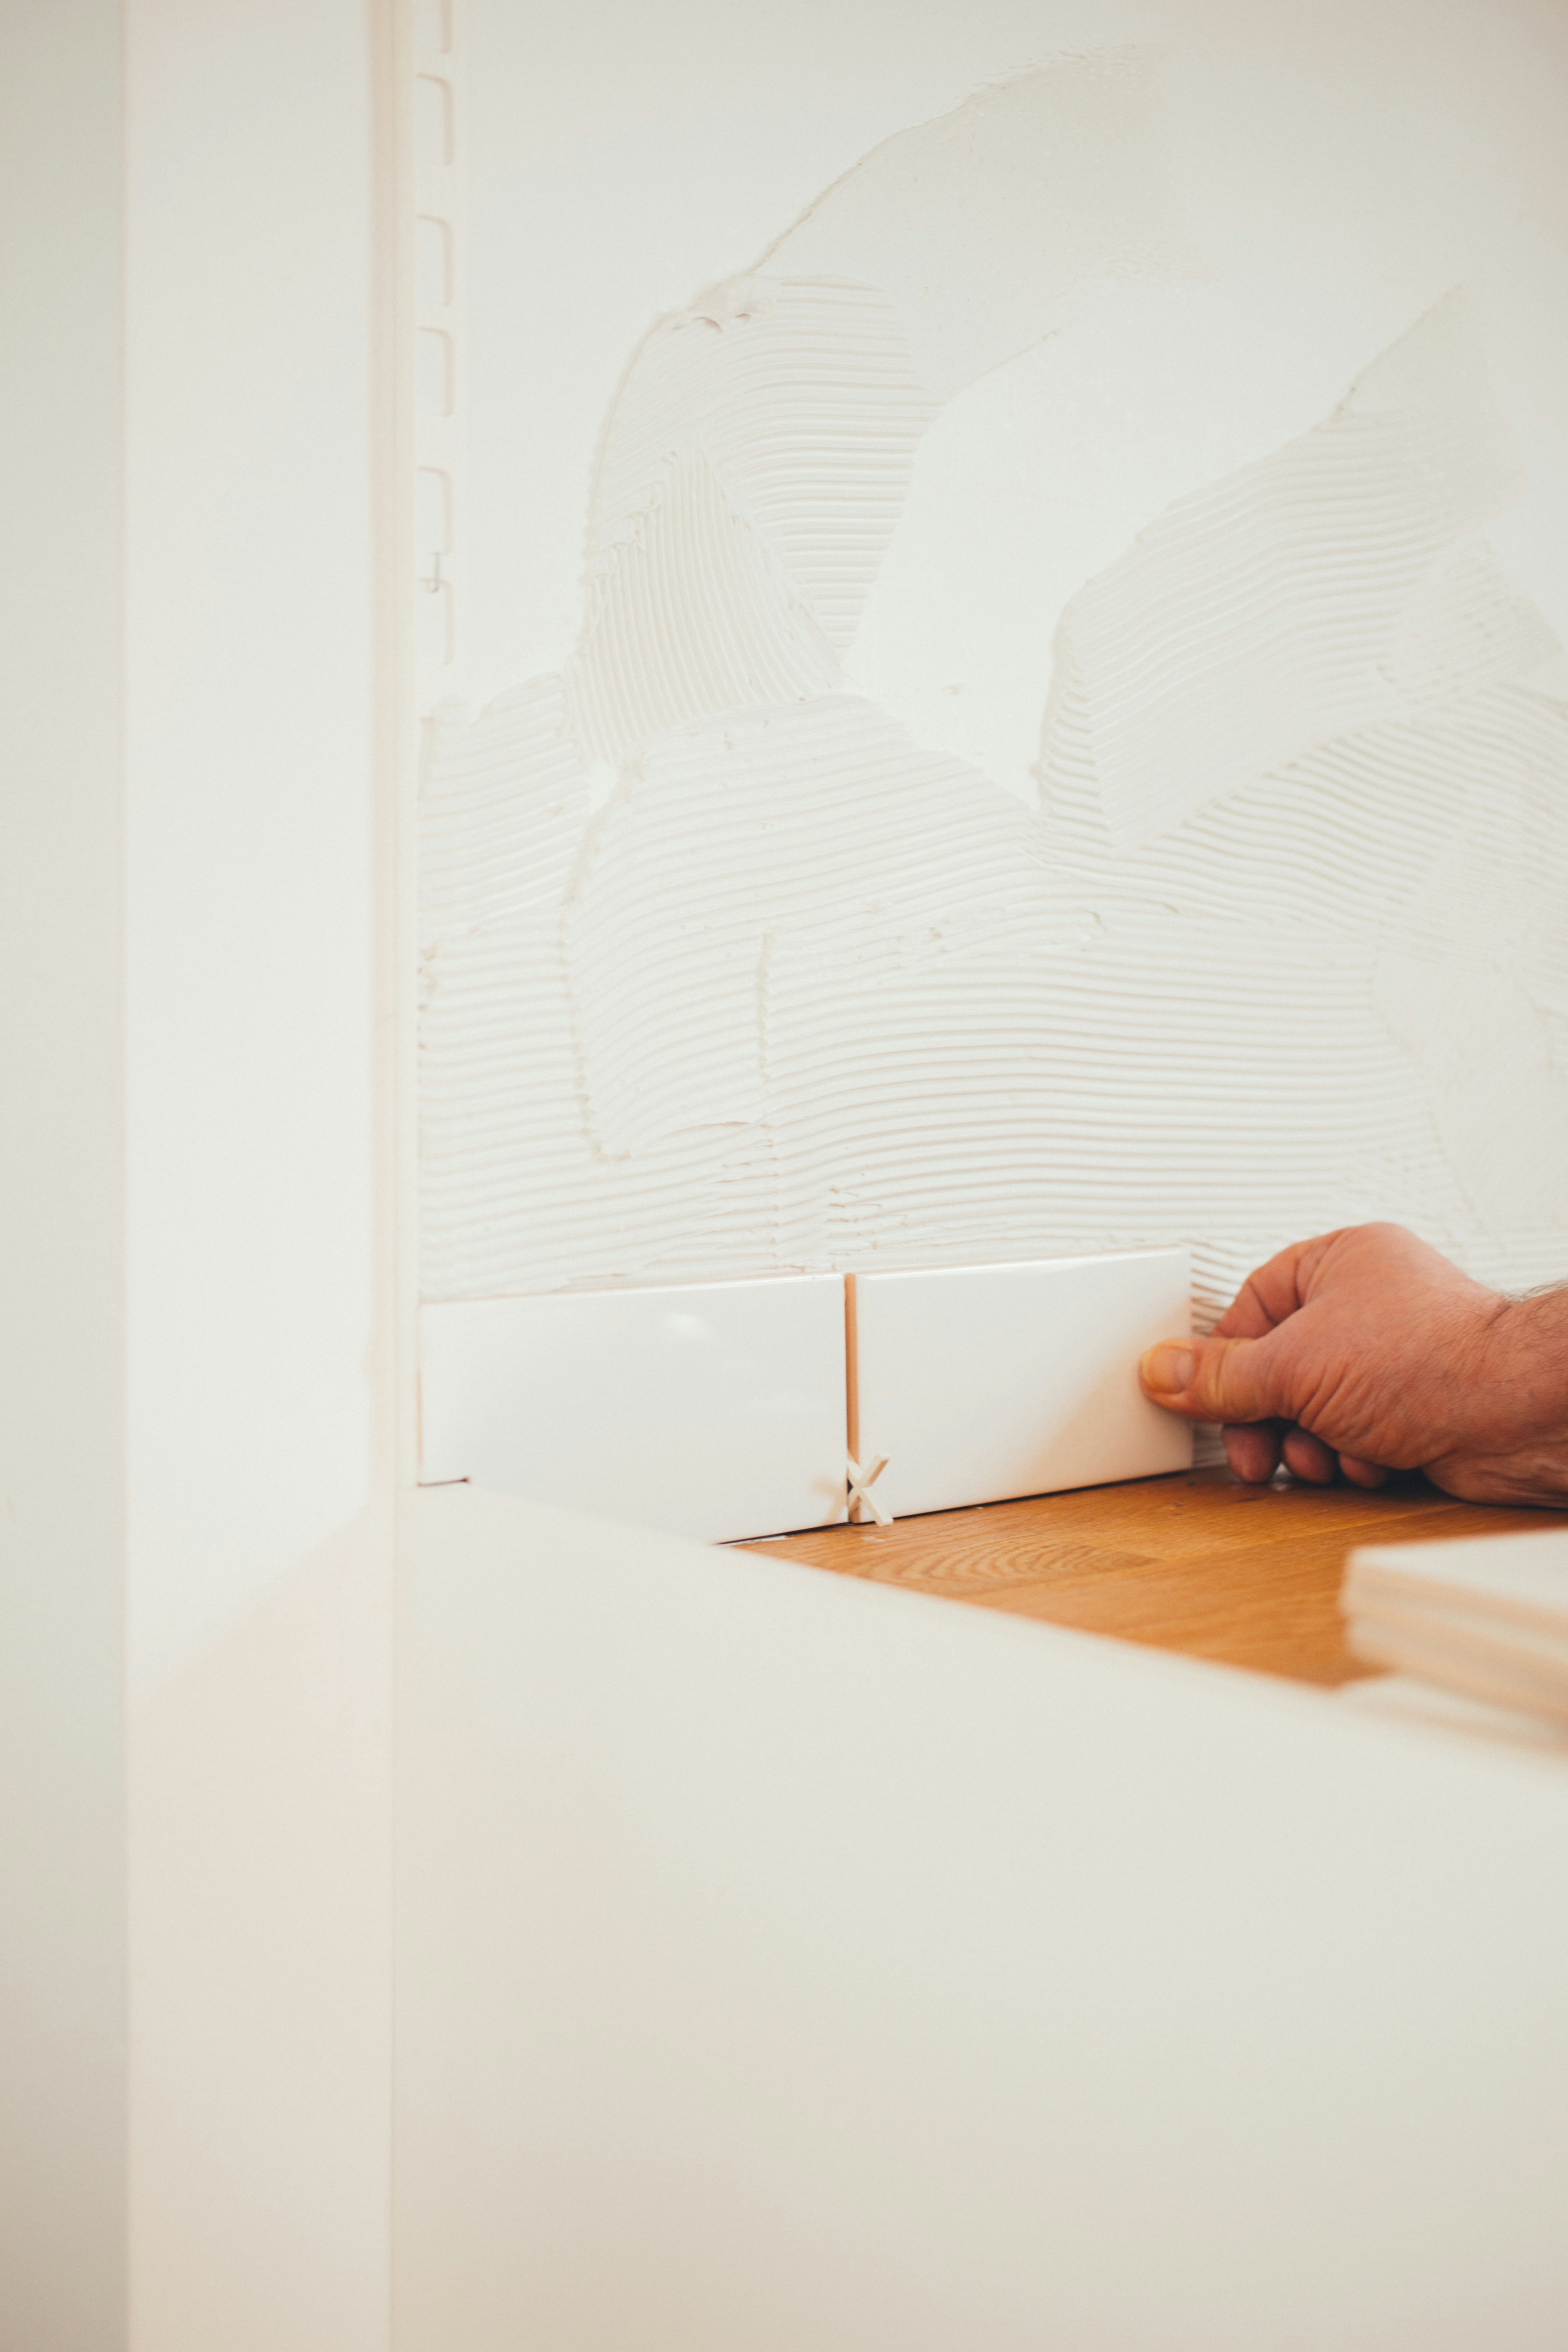
    5. What are some easy DIY projects to update my home on a budget? Some simple DIY projects include painting an accent wall, adding a peel-and-stick backsplash in the kitchen, or creating a gallery wall with thrifted or homemade artwork.
    6. How can I update my flooring on a budget? Consider options like painting your existing floor, using floor stickers or peel-and-stick vinyl tiles, or adding an affordable area rug to update your flooring without a significant investment.
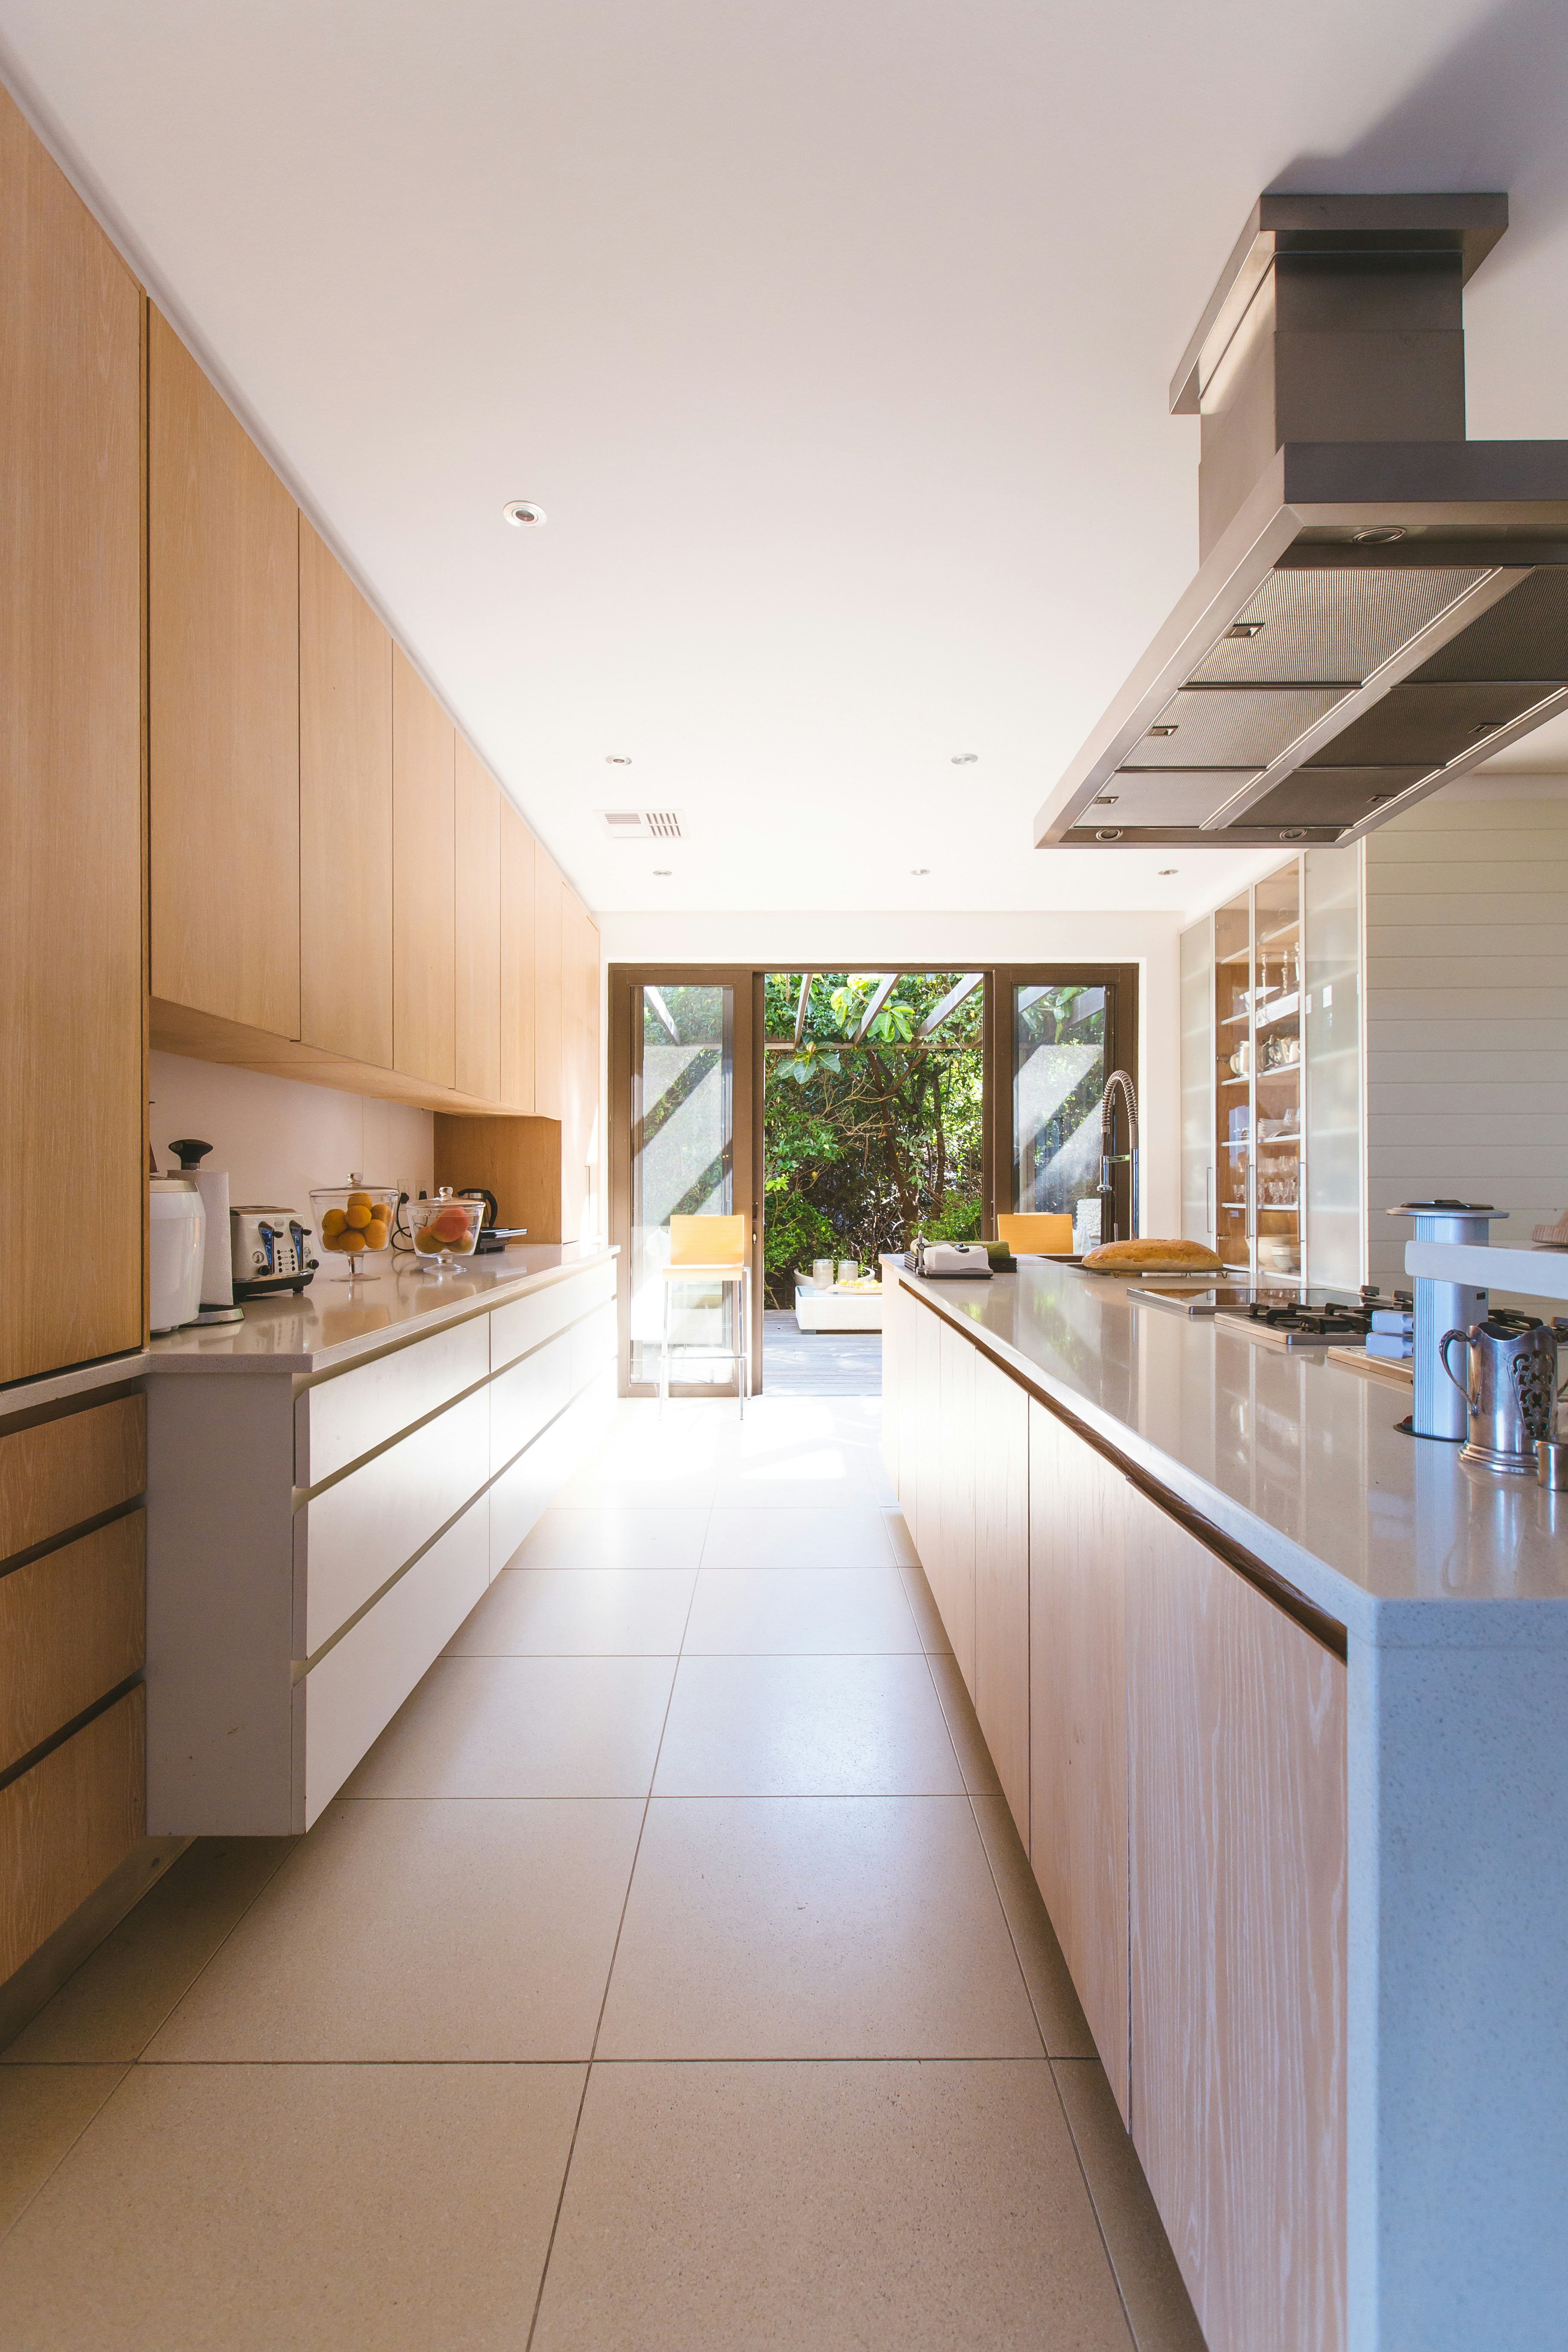
    7. Can I revamp my kitchen on a budget? Absolutely! You can make impactful changes by painting your cabinets, replacing cabinet hardware, updating the lighting, or adding a new backsplash using affordable materials like peel-and-stick tiles.
    8. What are some low-cost ideas for updating a bathroom? Consider painting your vanity, updating the hardware and fixtures, adding a new shower curtain, or installing a decorative mirror to give your bathroom a fresh, updated look without spending much money.
    9. How can I make my home more energy-efficient on a budget? Simple steps like sealing gaps around windows and doors, installing energy-efficient light bulbs, and using a programmable thermostat can help you save energy and money in the long run.
    10. What are some creative storage solutions for small spaces? Utilize vertical space with wall-mounted shelves, use under-bed storage containers, choose furniture with built-in storage, and add hooks or pegboards to walls to maximize your storage options in a small space.
    11. How can I personalize my rental home without risking my security deposit? Opt for temporary and non-damaging décor solutions, such as using removable wallpaper, hanging artwork with adhesive strips, and utilizing tension rods for curtains instead of drilling holes for curtain rods.
    12. What are some tips for decorating a small outdoor space on a budget? Incorporate small, versatile furniture pieces, use vertical planters or hanging baskets for greenery, and add outdoor string lights or lanterns to create a cozy ambiance without spending a lot.
    13. How can I refresh my bedroom without buying new furniture? Update your bedding with new linens or throw pillows, rearrange your furniture for a new layout, add a fresh coat of paint or a removable wallpaper accent wall, and incorporate new lighting to create a fresh look without purchasing new furniture.
    14. What are some inexpensive ways to make my home office more inviting? Add personal touches with artwork or family photos, incorporate plants or greenery for a natural element, and use affordable storage solutions like shelves or desk organizers to keep your workspace tidy and functional.
    15. How can I create a cozy living room on a budget? Incorporate soft textures with throw blankets and pillows, use ambient lighting like floor lamps or string lights, and arrange your furniture to create a comfortable and inviting conversation area. Look for budget-friendly décor items and furniture at thrift stores, garage sales, or discount retailers to keep costs down while creating a cozy space.


  • Low-Cost DIY Renovation Strategies for Your Home

    Low-Cost DIY Renovation Strategies for Your Home

    I recently found myself in a situation where I needed to tackle some renovations on my home without breaking the bank. As an avid DIYer, I decided to take matters into my own hands and create a plan for renovating on a budget. After researching various strategies, materials, projects and more – all while trying not to overspend or go overboard with time commitments – here’s what worked for me!

    First things first: planning your renovation is key! Before purchasing any supplies or tools, you need to have an idea of exactly what needs done as well as how much it will cost. Budgeting ahead of time can help prevent costly mistakes down the road; this way you’ll know exactly how much money you should be spending before starting anything major.

    Choosing low-cost materials was essential when it came to staying within our tight budget restrictions – especially since we opted out of hiring professionals at times due mostly because they were too expensive (or there wasn’t enough room in our timeline). We made sure that whatever material we ended up using met both quality standards and price points that fit within our financial boundaries so nothing had us going over-budget later on during execution phase either.

    Identifying DIY projects was also important part of keeping costs low and manageable throughout the entire project duration itself along with making certain each task could be completed safely by ourselves instead relying solely upon outside contractors who would charge outrageous rates just do basic jobs such as tiling floors or installing cabinets etc. With careful consideration taken beforehand, we managed execute most everything correctly from start finish which meant saved quite bit cash overall.

    Executing your renovation requires patience but if done properly can lead positive outcomes even after completion stage has been reached. Not only did these tips allow us stay under allocated expenses but provided opportunity learn new skills through trial error give sense accomplishment feeling once finished product finally revealed friends family members alike!

    Finally, adding finishing touches for home helped complete look feel which took amount effort begin design until end results achieved living space looked like something straight magazine cover page picturesque perfection! Whether simple methods accessorizing furniture painting walls vibrant colors addition house plants achieve desired atmosphere always good idea put extra care into every detail make place truly shine unique personality able show off pride joy no matter whom might come visit anytime soon afterwards!

    Planning Your Renovation

    When it comes to DIY renovations, the key is in the planning. It’s important to start by setting a budget and timeline for your project. There are many online resources that can help you with estimating materials as well as labor costs associated with different types of projects. Once you have an idea of what kind of renovation project you’d like to take on and how much it will cost, decide whether or not this is something that you feel comfortable tackling yourself or if hiring additional help might be necessary.

    It’s also important to consider factors such as safety when taking on DIY home improvement jobs; make sure all tools are properly maintained and stored away from small children who may wander around during projects! Additionally, research building codes for any structural changes being considered so that all standards are met before starting work – failure to do so could result in costly fines later down the line. Having a plan laid out ahead of time can save money by preventing mistakes along the way which require extra supplies or labor hours for fixes later on down the road.

    DIY renovating is often more affordable than using professional services but requires careful consideration and preparation beforehand in order to ensure success without breaking one’s budget limit over unforeseen obstacles throughout construction phases! With proper planning and dedication, anyone can create their dream space while staying within financial boundaries set forth at inception – now let’s look into choosing low-cost materials next!

    Choosing Low-Cost Materials

    When it comes to low-cost DIY renovations, identifying the right materials can make all the difference. For example, when replacing flooring in a room, look for vinyl tiles as they are much more cost effective than ceramic or wood. Vinyl is also easy to install and very durable so you won’t have to worry about any costly repairs down the road.

    Another great way to save money on your renovation projects is by purchasing secondhand items from online stores like Craigslist or eBay. While these pieces may need some extra cleaning and care upon arrival, this strategy will still end up costing less than buying brand new furniture or appliances that would fit into your desired design aesthetic without breaking your budget!

    Finally, don’t forget that thrift shopping at local markets such as flea markets or yard sales can be an excellent source of hidden gems when it comes to renovating on a budget — just take time sifting through all those finds before making any purchases! With these tips in mind, anyone should be able to find what they need for their own DIY renovations while staying within their budget constraints.

    Now that we’ve discussed how choosing cost efficient materials can help lower costs associated with DIY home renovations – let’s turn our attention towards another key element: Identifying which projects are actually feasible for someone taking on this task alone!


    Low-Cost DIY Renovation Strategies for Your Home
    Image Credit: iPhX_T4K9Mk

    Identifying DIY Projects

    When it comes to DIY renovations, the possibilities are endless. Before you get started on any projects however, you should take a step back and assess what type of renovation your home needs or which areas need sprucing up. It’s important to identify specific goals for each project before beginning so that your efforts can be focused toward achieving those objectives.

    If budget is an issue but still want to make upgrades around your house, consider focusing on smaller items such as changing out fixtures and hardware like door knobs or cabinet pulls. These small adjustments can have big impacts in terms of style without breaking the bank! You could also repaint some rooms with fresh new colors if they are looking dull or outdated – this simple change will give a room an entirely new vibe with minimal effort required from you. If there’s outdoor space involved in your home then landscaping touches may be necessary too; think planting flower beds full of vibrant blooms come springtime or laying down mulch in gardens during fall months for example – these seasonal changes add instant curb appeal without needing professional help!

    DIY renovations don’t always mean completely overhauling every aspect of a room; sometimes all it takes is one minor detail that makes all the difference! Once you’ve identified potential projects around the house though, executing them correctly (and safely!) is key – next we’ll look at how best to do just that when carrying out DIY Renovations successfully at home.


    More Resources on DIY Renovations:
    https://www.bhg.com/home-improvement/advice/planning/read-this-before-you-start-your-home-renovation-281474979547593/
    https://thediyplaybook.com/how-to-prepare-for-a-home-renovation/
    https://www.lonny.com/Home+Renovation+Ideas+You+Can+DIY

    Executing Your Renovation

    Once you have settled on a plan and budget for your DIY renovations, it is time to get started. Depending on the size of the project and complexity of tasks involved, this could take anywhere from one weekend to several months. First-time renovators would be wise to start with small projects like painting or replacing doorknobs before attempting more complex upgrades such as electrical work or plumbing repairs. Be sure that all tools are in working condition prior to using them, and always follow safety protocols when completing any home improvement task.

    To ensure successful completion of your DIY renovation plans, research materials carefully ahead of time so you know exactly what’s needed for each step along the way; prioritize based on skill level; consider renting tools if necessary; enlist help from family members or friends who may have experience with similar projects; seek out advice from experts either online or at local hardware stores if something becomes too challenging without assistance. Taking these precautions can save valuable time – both during execution of your renovation project as well as post-renovation clean up – while helping you avoid costly mistakes down the road which could add up quickly over multiple phases within larger scale renovations.

    Finishing Touches for Your Home

    Finishing touches for your home are the last step in any successful DIY renovation. This is the stage where you can really put your personal touch on the space, making it feel truly yours. It’s important to remember that the finishing touches don’t have to be expensive; you can find many budget-friendly options that will still look great and give your home the personal touch you are looking for.

    For instance, you can add a pop of color with a new coat of paint, or add some texture with a patterned rug. Wall art is another great option for adding a personal touch, and you can find many affordable options. Adding plants to your space is also a great way to add life and beauty to any room. You can also find some unique and interesting pieces at thrift stores or flea markets to give your home a unique look.

    Overall, planning your renovation is the key to a successful DIY project. From choosing low-cost materials to identifying DIY projects and executing your renovation, each step is essential to the success of the project. Don’t forget the finishing touches, which can really make your home feel special and unique. With a bit of creativity and some budget-friendly ideas, you can create the home of your dreams.

  • Reinvigorate Your Home with These DIY Renovation Ideas

    Reinvigorate Your Home with These DIY Renovation Ideas

    I remember the first time I thought about renovating my home. It felt like a daunting task, but it didn’t have to be. After some research and planning, I was able to find out how to reinvigorate my space on a budget with DIY renovations. In this blog post, we will discuss budgeting for your renovation, choosing the right materials and tools for success, what steps you need take during an effective renovation as well as finishing touches that make all of the difference in creating your perfect space.

    DIY renovations can sound intimidating at first; however when done properly they are possible without breaking your wallet or taking up too much of our precious free time! The key is proper preparation which includes researching different types of materials suitable for each project and setting realistic expectations about costs associated with these projects so that no surprises arise halfway through them! When selecting material pay attention not just to its price but also quality – cheap does not always mean good value if something needs replacing sooner rather than later due to poor workmanship or low-grade components used during manufacturing process. Additionally understanding basic principles related tool selection such us power vs hand powered tools helps ensure safety while working on any given project – think twice before tackling anything beyond scope safe DIY practitioner should handle themselves (with help from experienced professionals where necessary).

    Once you’ve selected appropriate supplies and sorted out cost considerations next step would involve laying down foundation by ensuring subfloors, walls, ceilings etc are ready prior start actual construction/renovation works here patience pays off since often times hidden issues could present itself only after initial demolition has been completed ! Having said that do not rush into things either – measure twice cut once proverb applies here more than ever so double check measurements multiple times throughout process until confident final results match original plans drawn earlier in anticipation stage . Finally once everything fits perfectly don’t forget adding those special design elements which really pull room together giving unique character feel desired by homeowner– even simplest items like curtains window frames lighting fixtures etc could turn lifeless looking area into cozy inviting spot family friends alike love spending time around.

    Finishing touches play big part successful DIY renos thus making sure every detail accounted important part overall plan completion timeline outcome result count towards satisfaction most homeowners strive achieve when embarking upon their own improvement journey ! By following above mentioned suggestions along other helpful tips tricks found online resources available today anyone willing put effort required can easily create beautiful functional living spaces fit tastes lifestyle requirements best reflecting personality people using them daily basis hopefully inspiring readers adopt similar approach revamp theirs homes sense newfound pride joy previously unknown before starting journey exciting endeavor referred commonly as “DIY Renovations”.

    Budgeting for Your Renovation

    When it comes to DIY renovations, budgeting is key. Before starting any project, it’s important to have a plan and know the financial implications of your decisions. To keep costs low without sacrificing quality, consider buying materials in bulk or secondhand. Reusing furniture can be a great way to save money; refinishing outdated pieces with paint or stain gives them new life for less cost than buying replacements. Additionally, shopping around for supplies from different stores can often yield better deals on high-quality items than simply purchasing from one place at full price.

    No matter how careful you are about spending money during DIY renovations, there may still be unexpected expenses that arise along the way – so make sure you leave yourself some wiggle room within your budget! With proper planning and research into the best prices available in your area, however, anyone can successfully complete their renovation projects while staying within their means financially.

    Now that we’ve discussed budgeting for DIY Renovations, let’s take a look at choosing the right materials next time – an equally important factor when considering home improvement projects!

    Choosing the Right Materials

    When it comes to DIY renovations, selecting the right materials is essential for success. It’s important to consider both form and function when choosing what type of material you need – from flooring and countertops to wall coverings and paint. Not only should the chosen materials match your desired aesthetic, they must also be durable enough to stand up against wear-and-tear over time.

    For instance, if you are looking for a new kitchen backsplash that will last through years of home cooking adventures then ceramic tile may be an excellent option as its impervious surface requires minimal maintenance while adding visual appeal in any space. On the other hand, hardwood floors can give rooms a timeless look but require regular upkeep such as sanding and refinishing every few years or so depending on foot traffic levels.

    It’s also important not to forget about insulation when starting your DIY renovation project; proper attic insulation could help save money on heating bills throughout winter months by keeping warm air inside your house where it belongs! Additionally, investing in energy efficient appliances such as washing machines or refrigerators with higher Energy Star ratings might pay off down the road too!

    Once you have selected all necessary materials for successful completion of your DIY Renovation project ,it’s time move onto selecting the right tools needed for completing each task efficiently–which we’ll discuss next!


    Reinvigorate Your Home with These DIY Renovation Ideas
    Image Credit: mA08QQzQf8Y

    Selecting the Right Tools

    DIY renovations can be a great way to reinvigorate your home without breaking the bank. But making sure you have all of the necessary tools and materials for each project is key to success. Your local hardware store will likely stock many of the basic supplies needed, such as paintbrushes, hammers, screwdrivers, drills and saws. Depending on what type of renovation you’re doing it may require more specialized tools like trowels or caulk guns that are better purchased online or from specialty stores for higher quality products. Research ahead of time which items you’ll need so that when it comes time to start renovating everything is ready!

    Having a good set-up with plenty of workspace also helps make DIY renovations easier in general – try setting up tables in different areas around your house where they won’t get dust everywhere while still giving space to work comfortably. With some preparation beforehand and having an idea about which tools will be necessary during any given project DIY renovations don’t need to seem overwhelming anymore; just take one step at a time! Moving forward towards successful completion takes planning — steps must be taken one by one with careful consideration before tackling bigger projects like Steps for A Successful Renovation coming up next…


    Steps for a Successful Renovation

    DIY renovations are a great way to update your home and make it feel more modern. Whether you’re adding an extra room, updating the kitchen or bathroom, or just giving the walls a fresh coat of paint – there are countless ways that you can reinvigorate your living space without spending too much money.

    To start off on the right foot with DIY renovations, it’s best to have a clear plan in place before getting started. Make sure you know exactly what needs doing so that all tasks get completed correctly and efficiently. It’s also important to take into account any safety precautions needed while completing these projects – such as wearing protective gear when using power tools or taking measures to reduce airborne particles during sanding etc.

    When tackling larger scale projects like tiling floors or building additional rooms, consider breaking up each task into smaller steps which will be easier (and less overwhelming) to complete over time. Additionally, if possible try delegating some of these tasks between family members; this is an excellent opportunity for everyone involved in learning valuable skills related to DIY renovation work!

    Finally, don’t forget about budgeting appropriately for materials since costs can add up quickly depending on how extensive your renovation project is going be! With careful planning and dedication however, transforming your home through DIY renovations is achievable no matter how ambitious your plans may seem at first glance.

    Now that we’ve discussed key considerations for successful DIY renovatons , let’s turn our attention towards achieving those finishing touches necessary for creating the perfect renovated space!

    Finishing Touches for a Perfect Renovation

    When it comes to finishing touches for a perfect renovation, the end result is all about the details. By carefully selecting the right materials, budgeting appropriately, choosing the right tools, and following the steps for successful renovation, you’ve come a long way in bringing your vision to life. To make your renovation truly stand out and be the envy of your neighbors, there are a few small but important details that will make all the difference.

    The first step is to assess the space and determine what kind of accessories are needed. Think about the overall design of the room and how you want it to look and feel. A few items like curtains, throw rugs, wall art, and vases can add a lot of personality and style. Similarly, adding some plants or flowers can bring life to the space. If you’re looking for a more dramatic effect, consider installing a feature wall or an accent wall. Once you’ve decided on the accessories, make sure to measure the space and choose appropriate sizes.

    Another important finishing touch is installation of the right lighting. Not only will good lighting make the room look better, but it can also make it more functional. Consider installing a dimmer switch, or adding a few accent lights in strategic locations. Additionally, consider investing in a few task lights for areas where you’ll be doing a lot of work.

    Finally, don’t forget to consider the aesthetics of the room. This means selecting the right wall and floor coverings, as well as choosing paint colors that complement the overall design. If you’re feeling ambitious, you can even consider adding some custom wallpapers. By carefully selecting the right materials, you can make your home look beautiful and feel inviting.

    By following these simple tips, you can reinvigorate your home with DIY renovations that are both practical and stylish. With a little bit of planning, the right materials, and some finishing touches, you can make your home a beautiful haven.

  • Exploring the Benefits of Investing in Luxury Renovations

    Exploring the Benefits of Investing in Luxury Renovations

    When I bought my first house four years ago, I had no idea how much work it would need. Little did I know that the most valuable investments were to come in the form of luxury renovations. At first, I was overwhelmed by the thought of tackling such an expensive project and didn’t understand why anyone would invest so heavily in a home improvement project. However, after doing some research and learning more about what goes into making these kinds of projects successful – from understanding costs to finding qualified contractors –I discovered there are plenty of benefits associated with investing in luxury renovations for your home!

    In this blog post we will explore all aspects related to making smart decisions when considering a luxury renovation investment – from understanding their cost implications and maximizing returns on them; through tips for locating experienced contractors who can bring your vision to life within budget; as well as maintenance strategies designed for preserving maximum value over time. Luxury Renovations have become increasingly popular among homeowners looking not only increase their property value but also improve overall quality-of-life standards at home by creating comfortable living spaces tailored precisely towards individual needs or family dynamics alike… So let’s dive right into exploring just exactly how beneficial they can be!

    The Benefits of Investing in Luxury Renovations

    When it comes to making a home beautiful, luxury renovations are the way to go. Not only do they give homeowners access to upscale designs and materials, but they also increase property value and can be used as tax deductions. For those looking for a unique makeover or an added touch of elegance in their living space, investing in luxury renovations is worth considering.

    Luxury renovations bring with them many financial benefits that far outweigh any costs associated with the project. One key benefit is that these types of projects often add more value than what was spent on them—increasing resale potential should someone decide to sell their home down the line. Additionally, some improvements may even qualify for tax credits or rebates from local governments if certain criteria are met! This means more money saved over time by taking advantage of this incentive program offered by municipalities across the country.

    Finally, investing in luxury upgrades such as high-end finishes not only increases aesthetic appeal but provides peace-of-mind knowing your investment will stand up against everyday wear and tear better than standard options would have done so initially – saving future maintenance costs too!

    Investing in quality Luxury Renovations can provide significant returns when done correctly while simultaneously providing huge amounts of comfort and satisfaction along with pride at having created something truly special within one’s own home environment.. Understanding all aspects involved with undertaking such a venture – including cost understanding – is essential before beginning any renovation work; regardless whether it’s considered ‘luxurious’ or not . With that said , let’s dive into understanding the cost of Luxury Renovations.

    Understanding the Cost of Luxury Renovations

    When it comes to luxury renovations, the cost is often a main concern. However, improving your home with luxurious upgrades can be an incredibly rewarding experience and long-term investment. When making decisions on what level of luxury you want to incorporate into your projects, consider how much value it will add in the future as well as how beneficial or enjoyable it may be for you now.

    For example, investing in high quality materials such as hardwood flooring instead of laminate could increase both the aesthetic appeal and resale value of your property down the line. Similarly spending more money upfront on energy efficient appliances can save homeowners considerable amounts over time due to lower utility bills. Often times these higher end products are also more durable than standard options meaning they won’t need replacing so frequently thus adding even more savings throughout their lifespan.

    Of course there will always be some financial limitations when renovating any area of a property but understanding that luxury improvements have potential returns makes them alluring investments for anyone considering remodeling their home or rental space. Now that we’ve discussed why one should invest in Luxury Renovations let’s look at Tips for Maximizing Returns on Luxury Renovations!


    Exploring the Benefits of Investing in <strong>Luxury Renovations</strong>
    Image Credit: oTcdXcXnzFc

    Tips for Maximizing Returns on Luxury Renovations

    When it comes to luxury renovations, there are a few key considerations that will help you maximize your return on investment. First, plan ahead and set a budget that fits within your financial means. Consider how much of the renovation cost can be covered by savings or other funds available to you. Budgeting upfront not only helps ensure that costs remain manageable but also allows for more accurate estimates from contractors and vendors so you can make informed decisions about each purchase along the way.

    Secondly, research potential materials carefully in order to find higher quality options at prices that fit into your budget range – these investments may pay off later if they last longer than their cheaper counterparts would have done over time. Additionally, consider any energy saving features such as solar panels which could reduce future bills while maintaining an attractive aesthetic value in comparison with non-solar solutions. Taking all these factors into account before beginning construction is critical for ensuring successful results of any luxury renovation project!

    Ultimately, when investing in luxury renovations it’s important to keep both short term and long term goals in mind throughout the entire process – this should include finding reliable professionals who are experienced with similar projects like yours too! With careful planning and execution every step of the way towards achieving desired outcomes from luxurious renovations can become easier than expected – setting up success stories rather than costly mistakes down the road… Now let’s explore ways we can go about finding those perfect contractors for our next big project: Luxury Renovations!

    Finding the Right Contractor for Luxury Renovations

    When it comes to luxury renovations, finding the right contractor is key. Whether you’re looking for a complete overhaul of your existing home or want to add some minor updates, having an experienced and reliable contractor by your side can make all the difference in achieving high-end results.

    To ensure that you get quality workmanship on your project, start by asking friends and family for recommendations from contractors they have used before. You should also research any potential candidates online thoroughly as well as check their reviews on sites such as Angie’s List or Home Advisor. Once you’ve narrowed down your list of prospective contractors to just a few options, request bids from each one so that you can compare prices and services offered before making a final decision about who will handle the job.

    Finally, always read through contracts carefully before signing anything with any contractor; this is especially true when dealing with luxury renovations where costs can quickly skyrocket if details are not outlined clearly upfront. Taking these extra steps now will save time and money later on while still allowing homeowners to experience all of the wonderful benefits associated with investing in renovation projects like increased property value and improved aesthetic appeal . With the proper planning beforehand , homeowners may be able enjoy those same luxuries well into future years -especially if they take care properly maintain them over time! Now let’s explore how best to do exactly that:

    How to Maintain Luxury Renovations for Maximum Value

    Maintaining luxury renovations for maximum value is an important part of maximizing returns on your investment. Regular maintenance and upkeep can help your renovations stay in top condition and continue to add value to your home. It is important to stay on top of routine maintenance and repairs, as well as addressing any major issues that arise. This can include cleaning, painting, replacing fixtures or fittings, or repairing any damage or wear and tear that has occurred over time.

    It is also important to ensure that you are using the right materials and products when maintaining luxury renovations. High-quality materials can help to ensure that your renovations last for years to come and that their value is retained. Working with a professional contractor can help you to select the best materials for your renovations, as well as provide advice on how to maintain them.

    In conclusion, investing in luxury renovations can be a savvy way to add value to your home. It is important to understand the costs associated with the renovations, as well as finding the right contractor for the job. Additionally, you should plan for regular maintenance and upkeep to ensure that your renovations stay in top condition and maintain their value. With the right maintenance plan in place, you can enjoy the benefits of your luxury renovations for years to come.

  • Focus on cleanliness and hygiene in the bathroom – Touch-free solutions upgrade

    Focus on cleanliness and hygiene in the bathroom – Touch-free solutions upgrade

    Cleanliness thanks to dirt- and bacteria-resistant surfaces, touch-free operation and hygienic comfort toilets: hygiene in the bathroom is more in demand than ever. The sanitary industry offers smart solutions for private and public bathrooms.

    Cleanliness and hygiene in the bathroom - Touch-free solutions

    Owners do not have to search long for suitable products. Almost all manufacturers offer smart solutions for growing hygiene requirements. But no one need fear sterile design! On the contrary, many products enhance the private lifestyle bathroom.

    Hygiene in the bathroom is a sensitive topic not only in times of Corona. But with the current concern for personal safety and the health of the family, with the almost reflexively practiced behavior of frequent hand washing and contact avoidance, it takes on an unexpected explosiveness. With the worldwide pandemic experience, bathroom cleanliness is once again coming into focus to such an extent that the hygienic product properties of sanitary equipment are once again becoming more important for consumers willing to renovate as well as for architects and for project planners of public facilities.

    Frequent hand washing and contact avoidance

    The topic is interesting from several perspectives at once: Hygiene properties of sanitary products are of interest from the point of view of preventive health care, but also because of their effect on care requirements, accessibility and, above all, on the sustainability of the bathroom. Hygiene functions often go hand in hand with the digitalization of home functions and are increasingly invisible in design. And in general: Measured against their great importance, sanitary hygiene features are conspicuously inconspicuous. That’s why it’s worth taking a closer look.

    Focus on hygiene in private and (semi) public areas

    The most obvious aspect when considering hygienic sanitary products is certainly the safety aspect – and not only for purely functional reasons, but also because the development of the bathroom into a lifestyle room increases not only the quality of the stay, but also the length of stay, and thus also the expectation of a feel-good atmosphere. After all, we seek comfort time in the bathroom and don’t want to constantly worry about bacteria and viruses.

    The private bathroom plays an important role in hygiene – all the more so in times when many family members use the bathroom throughout the day. To ensure that it does not become a breeding ground for unwanted germs and bacteria in the humidity and heat that always occur here, care measures and simple rules of behavior such as good ventilation play a role in addition to modern equipment.

    In semi-public and public spaces, the issue of hygiene is currently even more relevant. The hospitality industry has to develop new hygiene concepts, and many sanitary facilities for offices, event locations or in public spaces have to be adapted and retrofitted to meet increased hygiene requirements. The sanitary industry offers numerous solutions for this, both for the private and the (semi-) public sector.

    Product care and environmental friendliness

    Product care and environmental friendliness

    The care properties of sanitary products are often directly linked to the issue of hygiene. Thanks to the latest antimicrobial technologies and surfaces, cleaning is no longer a big deal. Special ceramic surfaces for washbasins and WCs, for example, make care significantly easier (e.g. KeraTect from Geberit or AntiBac and CeramicPlus from Villeroy & Boch). This is a coating baked into the ceramic, on which dirt and limescale do not adhere, so that residues run off more easily with the water. In addition, according to the manufacturers, bacterial growth is significantly inhibited. There are also similar solutions for vanity consoles and toilet seats that prevent microbial growth. Modern toilets also have a water flush that does not require a flushing rim and thus offers hardly any points of attack for bacteria or germs. Another advantage is the environmental friendliness during maintenance, as aggressive WC cleaners can largely be dispensed with here.

    New features for the Toilet

    When it comes to minimizing manual surface contacts, the digitization of toilets and fittings in particular offers major advantages. For example, some toilet actuator plates conceal sensor technology that can be used to trigger the flush completely without contact (e.g. Visign for Style 25 sensitive from Viega). This involves wiping the hand past a function field (graphically highlighted by gridded light points). Villeroy & Boch offers a toilet with a “think-along” function that flushes independently if the user forgets to do so or cannot trigger the flush themselves. This prevents the formation of germs due to stagnant water when the toilet is empty or when the user is traveling.

    Modern shower toilets often offer even more functions than touchless flushing. For example, many shower toilet models no longer even require the user to touch the lid – such as the Sensia Arena model from Grohe. Sensor control allows the lid to open and close automatically when a user approaches the toilet. Some shower toilets even have a Bluetooth interface (e.g. Mera from Geberit) and can be operated using a smartphone. In addition to technological progress, the standard of cleanliness established by the increasing acceptance of shower toilets is certainly also a cultural advance. The targeted and thorough intimate hygiene with a pulsating shower jet conveys a daily feeling of freshness. Depending on the equipment, the shower toilets have an integrated self-cleaning function.

    Touch-free even in the private bathroom

    When it comes to caring for washbasins and faucets, another advantage of touchless models becomes clear in addition to improved hygiene: Since no operating element needs to be touched, hands generally remain under the spout while washing hands; thus, no water drips from hands onto the mixer. This results in fewer water spots and limescale residues on the surface of the mixer, and the cleaning effort remains low. With some Kludi models, it is also possible to deactivate the sensor system when the sink is being cleaned.

    An almost touch-free hygiene concept can be implemented for the private bathroom. Thanks to touch-free soap dispensers such as the one from Keuco’s Plan series, there is no longer any need to touch anything when lathering up. In addition to its function as a dispenser for foam soap or disinfectant foam at the washbasin, it can also be used as a hygiene foam dispenser at the WC. With a little hygiene foam, a normal toilet paper can be easily transformed into a wet wipe that can be thrown down the toilet without hesitation. This is particularly interesting for toilets in public spaces where the use of shower toilets is out of the question.

    Sensor technology in public sanitary facilities

    Sensor technology in public sanitary facilities

    In public or semi-public facilities, hygiene has proven to be a particularly sensitive area. Washbasins and toilets in office complexes, restaurants, fitness studios, hotels, event venues, schools or universities, but especially in hospitals and nursing homes, belong on the test bench. Touchless products will play a key role in this. The technology is mature and can help to implement the hygiene requirements that have grown with the pandemic experience. After all, it is precisely touching the faucet that should be avoided wherever possible. Conventional faucets are first touched with unwashed hands, which could transfer germs and viruses to the faucet surface. At the same time, new germs and viruses could possibly be picked up through cross-contamination after washing.

    Touch-free faucets are therefore a good alternative for making the so vehemently propagated hand washing more hygienic. Moreover, the faucets hardly differ in appearance from conventional models: Due to the progressive miniaturization of sensor technology, the design of the fittings can be adapted to the architectural environment.

    Dornbracht goes one step further with its Touchfree variant, which is compatible with all of the manufacturer’s fittings series. The system, based on high-frequency technology, detects movement even without an infra-red eye. The HF sensor is positioned below the washbasin, invisible to the user. Functions such as temperature setting, follow-up time or cleaning stop can be set via a separate, live system box. The range of the sensor can be adapted to the wishes of the operator or the conditions of the room. In addition, the automatic start-stop function can save a considerable amount of water during prolonged soaping and hand washing – a not inconsiderable energy-saving advantage, especially when hot water is used.

    With modern faucets, water flow time, sensor sensitivity or automatic hygiene rinsing can be set via app using a smartphone or tablet. Cleaning times, rinsing intervals and rinsing duration are individually adjusted. Faucets are available both mains- and battery-powered, with low-energy electronics ensuring a long service life without battery replacement. When retrofitting with a sensor mixer, the battery variant is recommended in many cases, as there is no need to pry open tiles to lay cables.

    Hygiene measures in the bathroom often also sustainable

    Hygiene in bathrooms and public sanitary facilities has been a trendy topic not only since the Corona crisis. The sanitary industry is therefore already in a position to respond to the current increased demand for particularly hygienic product concepts with a whole range of innovative products for washbasins and toilets.

    Hygiene products in the bathroom undoubtedly represent a growth market. And with many of the hygienic sanitary products, the aspect of sustainability is already included. Less water used for toilets and hand washing, energy savings through on-demand flow of hot water, reduction of cleaning agents, touch-free comfort functions in private bathrooms and hotel bathrooms, long periods of use thanks to durable design and high quality standards: the hygiene ideas of the sanitary industry are not only effective and increase comfort, they are also sustainable.


    Focus on cleanliness and hygiene in the bathroom pin

    Don’t compromise on cleanliness and hygiene in your bathroom! Upgrade your faucets to touch-free solutions for a safer and healthier experience. Browse through our online shop’s bathroom faucet section to find a wide range of modern options that allow you to set water flow time, sensor sensitivity, and automatic hygiene rinsing via an app on your smartphone or tablet.

    With individually adjusted cleaning times, rinsing intervals, and duration, our touch-free faucets are available in both mains- and battery-powered options. Plus, low-energy electronics ensure a long service life without battery replacement. If you’re retrofitting with a sensor mixer, we recommend the battery variant, as there’s no need to pry open tiles to lay cables.

    So, what are you waiting for? Check out our online shop now and make your bathroom a safer and more hygienic space!

  • What are the best ceiling options for bathrooms?

    What are the best ceiling options for bathrooms?

    The bathroom is usually the smallest room in a home – so doesn’t it rather matter what the ceiling looks like? As long as it is neat and clean? No, you shouldn’t look at it that way. Today, the bathroom is the wellness room in a home, so the ambience is also important, and you can’t ignore the ceiling. And: It is humid in the bathroom. Not every material can cope with that equally well.

    What are the best ceiling options for bathrooms?

    Nevertheless, there are many possibilities. The choice must therefore be well considered. Everyone has to decide for themselves. But we will show you several options here for your consideration.

    Exposed concrete – something special for new buildings

    Is it about the bathroom design in a new building that is yet to be built? Then you are lucky and can choose between most options. For example, a ceiling made of exposed concrete can also be considered – but it must be installed from the very beginning. This is somewhat more expensive than other solutions and is therefore probably only suitable for owner-occupied homes.

    In addition, an exposed concrete ceiling must be produced with the highest level of professionalism – so it’s not for do-it-yourselfers. For these, however, there is a consolation – plasters and even wallpapers are offered in the exposed concrete look. But it’s just not quite real.

    Painting – but the right way

    Painting - but the right way

    Let us therefore turn to the more common, because also cheaper options of ceiling design. The simplest is to paint an existing ceiling. This means the greatest choice, especially in terms of color. It becomes more difficult when a ceiling must first be straightened, i.e. sanded down. This is either a lot of work or expensive. When painting, it is always important to prime with a deep primer – so that the paint will last and the color tone will be even.

    And then there is the question of the type of paint. There are special damp room paints that contain additives against the formation of mold. If you want to achieve this without chemicals, you can use lime paint, which you can color as you like with pigments. It is not advisable to use sealing latex paints. It is best to get the paint in specialized stores and discuss the choice with the expert.

    Plastering – not for do-it-yourselfers

    Plastering - not for do-it-yourselfers

    You can also plaster a ceiling in the bathroom. With color and texture, you have a lot of design options; it’s a good idea to plaster the ceiling just like non-tiled walls in the room. However, plastering overhead is not for beginners. Either get a professional right away, or practice on a basement ceiling in a room that no visitor will ever see. If you really want to do it yourself, you can try roller or brush plaster, which is processed like paint, but looks almost like plaster.

    And again it comes down to choosing the right plaster. You should avoid all bags with the word plaster when shopping for the bathroom. Plaster almost magically attracts the mold. Lime plaster has the opposite effect and is recommended, in old buildings also clay plaster. It absorbs moisture well and releases it again, thus helping to balance the atmosphere of the room. In any case, the plaster should be mineral and breathable. In addition, the substrate should be primed so that the plaster adheres equally well everywhere.

    Suspended ceilings

    Suspended ceilings

    If the existing ceiling is not suitable for plastering or painting, or if the bathroom is simply too high, then a suspended ceiling is an option. So you pull in a second ceiling with a certain distance. This has the advantage that you get a nice straight ceiling, in which you can also integrate spotlights as desired.

    Today, suspended ceilings are made with plasterboard. Instead of the traditional gray boards are usually used green boards, which are suitable for wet rooms. Quite new on the market are boards that are so resistant to moisture that they can even be installed outside. The higher price tag does not really matter for the few square meters that are usually involved in the bathroom.

    Substructures in drywall construction are made of wood or metal. Today, the professionals all work with specially offered systems made of metal, which even the layman can easily handle. In the bathroom, wood also has the disadvantage that it swells with a lot of moisture.

    Suspended ceilings can be painted and plastered, but also wallpapered. Sheetrock, which will subsequently be painted or wallpapered, require great care when filling the edges and fastening screws. Here you should definitely find out how to do it correctly.

    A suspended ceiling is very functional in the new bathroom. Good looking, it can hide electric wiring, ventilation pipes, and etc. A suspended ceiling can be of different types: metal or moisture-resistant gypsum-plaster.

    For the ceiling area increase, suspended ceiling boards should be mounted perpendicularly (a 90-grade angle) to the long wall or diagonally. For creation of the effect of a high ceiling, mirror boards or white mat boards with mirror fillets between them are used.

    A moisture-resistant gypsum-plaster ceiling can be made multilevel one of any shape: semicircle, diamond-shaped, oval, circle, zigzag lines with decorative cornice, into which daylight lamps can be installed. Spotlights can also be installed in the gypsum-plaster ceiling.

    Ceiling Panels

    If you want to cover the ceiling with panels, it is best to build a substructure of roof battens. This not only facilitates the attachment of the panels, but also creates space for the cables of spotlights, which are recessed into the ceiling. In addition, this way the cladding is ventilated and always dry. When installing, be sure to leave a gap all around for air exchange.

    Theoretically, you can also attach panels to a suspended ceiling made of sheetrock, but you have to solve the problem of the weight of the panels. If you want to have a suspended ceiling, it is best to build a substructure from roof battens at the desired height and do without the plasterboard.

    Important for panels is the choice of the right material. Products that are made entirely of plastic, do not cause problems. If wood is installed, it may have problems with moisture – it depends on the wood. In any case, it must be installed back-ventilated. It is best to use panels that are expressly intended by the manufacturer for use in bathrooms.

    Wallpaper – why not also on the ceiling

    Wallpaper today in wall design is no longer a must as it was in the past. But this does not speak against the idea. Wallpaper is available in many designs, but you should already resort to the special products for wet rooms. Especially for apartment tenants, it is a weighty argument that you can use it to customize the ceiling without the plaster surface underneath getting paint or drill holes.

    However, wallpaper requires, it should be remembered, a very smooth surface. It may therefore be necessary to fill and sand – these are not very pleasant works on a ceiling. And for uniform adhesion of the wallpaper paste, it is recommended to treat the surface with a primer.

    In one respect, wallpaper is like plaster: working overhead is not easy – it’s easy to lose your nerve when the sheets come at you repeatedly. Here, too, it is advisable to practice on an unproblematic basement ceiling if you do not want to hire a craftsman.

    Stretch ceilings

    If you want it to be particularly smooth and cool, you can have a stretch ceiling installed in your bathroom. The special look speaks for this variant – you just have to decide whether it fits into the overall concept of the bathroom or not. They are available in various surface textures, from matt to glossy, in all colors and many designs.

    However, stretch ceilings are not for do-it-yourselfers, but a project for professionals. This is because they are stretched with strips under the ceiling. After installation, they are briefly heated so that they contract and everything looks extremely smooth.

    However, stretch ceilings are not able to absorb even the smallest amount of moisture. If all the walls are then also largely tiled, this becomes a problem. Then you need to ventilate sufficiently, otherwise the water will condense on the ceiling and walls.

    Ceiling Lights

    Ceiling Lights

    Let’s turn to the lighting now. A new bathroom should be lit brightly. Bright light arises bright feelings, feelings of protectiveness and joy. A simple wall lamp creates a lot of unnecessary shadows, that is why it is better to replace it with spotlights, built into the suspended ceiling. There exist spotlights of various shapes and colors, with halogen bulbs and incandescent lamps. You should choose the type of light you need before making a renovation of your bathroom. Halogen bulbs produce sharp directed ray of light. If you need to highlight some place in your bathroom, it is reasonable to use a rotary lamp with halogen bulbs. You can get softer light out of halogen bulbs with the help of glass diffuser, preset in the shape of the lamp. Incandescent lamps produce more uniformly diffused, soft and bright light. For a bathroom lighting mirror with the built-in lamps will also fit.

    Other Important Points to Consider

    While making bathroom renovations one should also pay attention to the following important points:

    1. The bathroom floor. The most important and difficult subject of the bathroom renovation is the floor damp proofing. Tiny cracks can lead to a damp proofing malfunction, which will result in leakage and fights with neighbors.
    2. Pipe run. It is important to carry out pipe and new bathroom equipment assembly in a quality manner, in order to avoid leakages.
    3. When making a plan for your bathroom renovation, don’t forget about ventilation. If the bathroom has poor ventilation, condensate will appear on the walls and ceiling, mold will appear as a result of it, and the whole bathroom renovation will come to nothing.

    Bathroom renovation and decoration give place to unbounded flow of fantasy. Read more in our other blog entries.

    The best ceiling options for bathrooms

  • How to Clean a Showerhead

    How to Clean a Showerhead

    Maintain your showerhead and keep the water flowing freely by removing mineral deposits such as limescale.

    How to Clean a Showerhead

    Showerheads commonly spray erratically since their little holes got plugged with mineral deposits. In order for water to flow freely, you need to remove limescale and other deposits.

    Cleaning your showerhead is also good for your family’s health. Wet settings like the one inside a showerhead are breeding premises for microorganisms. In fact, a current study by scientists at the Cooperative Institute for Study in Environmental Sciences discovered that residential showerheads often contain abundant quantities of Mycobacterium (a germs understood to trigger lung illness) expanding in the slimy film that lives inside your shower nozzle.

    Thankfully, you can descale your showerhead using a handful of home items. To find out exactly how to cleanse a showerhead, follow among our two expert-recommended methods. Both will certainly clean your showerhead overnight while you sleep, as well as one doesn’t also require utilizing any tools!

    Prior to you start cleaning a showerhead, determine simply exactly how negative the blockage is. If water is still coming out of the nozzle and a lot of the little openings seem clear, you most likely won’t need to get rid of the showerhead for deep cleaning. If the water circulation is extremely limited and also the accumulation appears severe, or if you attempted cleaning up the showerhead without removing it yet are still having water stress concerns, you could require to eliminate the head from the shower arm. Likewise, if your showerhead has a chrome, stainless steel, or other secured metal surface, attempt cleaning your showerhead while it’s still attached first. Devices can scratch those fragile coatings so prevent them if you can.

    Just how to Clean a Showerhead Without Removing It

    If you can not remove your showerhead or just wish to skip that step, you can remove surface area mineral deposits with this little trick that calls for nothing more than a rubber band, a plastic bag, and also some vinegar.

    Step 1: Use a plastic bag filled with vinegar

    Initially, slip a rubber band over the top of the showerhead. You could want to loop it around the shower arm one or two times so it’s tight on the pipes. Load a plastic bag with distilled white vinegar. Connect the bag to the showerhead by sliding the top edge of the bag beneath the elastic band.

    Step 2: Wait and then rinse

    Wait at least one hour, then remove the bag as well as turn on the water to purge. Polish with a soft fabric.

    How to Deep Clean a Showerhead

    Step 1: Detach the Showerhead

    To detach the showerhead, loosen the nut at the shower arm. Take care not to harm the fixture’s surface. Use a wrench instead of pliers. Support your device with a cloth while you work to avoid damaging.
    If mineral deposits show to be past the power of vinegar alone, you will certainly need to eliminate the showerhead to do an extra detailed cleaning.

    Action 2: Rinse the Showerhead

    Run a sharp blast of water via the showerhead by holding it inverted beneath a faucet. Your goal is to rinse loosened up debris out with the opening that attaches to the shower arm. If there are still mineral deposits, you can scrub the showerhead with an old toothbrush as well as vinegar to loosen particles.

    Step 3: Take Apart as well as Clean the Showerhead

    Use a toothpick or safety pin to jab out added deposits. (If you have a showerhead with flexible plastic nubbins, you can likely control them with your fingers to damage calcium deposits loose.).

    Step 4: Saturate the Components in Vinegar Overnight

    Involve the showerhead totally in vinegar to dissolve as well as staying limescale down payments. For additional cleansing power, scoop a few tablespoons of baking soda in the vinegar before soaking them. The all-natural abrasive will certainly aid launch stopped up passages. Rinse again.

    Step 5: Rebuild and Re-install Your Showerhead.

    First, cover new plumbing tape around the strings of the shower arm to make certain an excellent seal. Reattach the showerhead to the shower arm utilizing a wrench. Safeguard the component’s finish with soft cloths or towels while you’re functioning.

    More Showerhead Cleaning Tips

    To maintain your water pressure steady and strong as well as keep microbial development to a minimum, plan to extensively cleanse your showerhead at the very least when a month. Make surface area cleaning with vinegar part of your bathroom cleansing routine on a regular basis. A couple of other words of advice for cleansing a showerhead:.

    Don’t use bleach to clean a showerhead. In the CIRES showerhead study, scientists located that chlorine bleach really raised the production of harmful germs in among the showerheads studied. And also, bleach can be caustic and destroy clothing, so it’s far better to prevent it.

    Don’t utilize a hard-bristle brush. If your showerhead has a chrome or protected steel surface, it might be susceptible to damaging and also messing up.

    Do work in a well-ventilated space. If you’re making use of any type of cleaner with solid fumes, be sure the area has proper air flow. This can include vinegar in addition to industrial cleansing items. Everyone responds differently to fumes, yet it’s best to open a home window or switch on an air flow follower whenever you’re cleansing your shower.

    Your showerhead needs replacement or an upgrade?

    Click here to see our complete collection of modern and functional shower heads.

  • Which type of Bathroom Faucets should I choose?

    Which type of Bathroom Faucets should I choose?

    Bathroom Faucets Types and MaterialsYou will only realize how many types of bathroom faucets there are on the market when you decide to install one in your bathroom. Bathroom faucets are made from many different materials, there are many different brands and they even come in many different colors. In this article we will go over the most important points and features to answer the question which type of bathroom faucets you should choose to get the best bang for your buck.

    For starters bathroom faucets can be categorized based on the materials they are made of. The most common materials that are used to make bathroom faucets are chrome, stainless steel, brushed nickel or brass.

    It is almost impossible to know exactly which one to choose from, especially when you are new in the bathroom renovation process. Design might be another factor when selecting a type of bathroom faucet and also the color or finish.

    To get a better understanding of bathroom faucets before you venture off to buy a specific type of faucet you should know exactly what kinds of faucets are available. Most bathroom faucets, like every other kind of faucet, are categorized based on the materials used to make them.

    Stainless Steel

    The most popular type of bathroom faucets are the ones made from stainless steel. This kind of finish is the most popular due to its durability and long lasting nature. Stainless steel faucets are usually cheaper than other kinds of faucets.

    Nevertheless, the stainless steel type does not fall behind in pros. Steel is durable and therefore it does not tarnish. As a result these types of faucets can last a lifetime. These types of fixtures are also easy to install. You don’t need to be a plumber to know how to do it; just follow the instructions. There are however some disadvantages as well. These are associated with the marks fingertips can easily leave on the steel. Stainless steel can accumulate hard to clean fingerprints very easy.

    Chrome

    One more popular type of bathroom faucets are the ones made from chrome. Chrome bathroom fixtures are fairly common in most older bathrooms. The way they are made is by using the electroplating method on brass and finishing the product with chrome.

    Chrome fixtures are much shinier than stainless steel fixtures and are usually priced reasonably. The price of the faucet depends on design as well so you can find some chrome faucets in high prices. The basic and most important feature of chrome bathroom faucets is that never erode and do not get scratched easily. Although chrome bathroom faucets have many positive features, they have one downside. Water marks easily stain these faucets and after long periods of usage, and after some years, the finish might disintegrate.

    Brass

    Brass is one more material used to make bathroom faucets. This type of faucet is less popular than then chrome and stainless steel ones. Brass faucets are solid, made only from brass and are very durable.

    Durability and style come with a price however and brass bathroom faucets usually cost more than other types. They give out a unique look to every bathroom installed in and really look stylish. The only problem that can occur with a brass faucet is rust. That’s why if you install a brass faucet you should seal it right away. Scratches are another thing, that’s why it will need polishing every now and then.

    Antique Brass Waterfall Basin Faucet with High Spout


    Water Saving Bathroom Faucets

    WaterSense labeled bathroom sink faucetsYou can use up to 50% less water by changing your old bathroom faucets to a new faucet with a flow regulator. For example WaterSense labeled bathroom sink faucets and accessories that use a maximum of 1.5 gallons per minute can reduce a sink’s water flow by 30 percent or more from the standard flow of 2.2 gallons per minute without sacrificing performance. (epa.gov)

    Bathroom Faucets with Cold-Start Function

    Have you every wondered what the Cold-Start or Cool-Start Function is? The cold-start function helps you save energy by limiting the use of hot water. Basically it is a very simple feature that means that only cold water will flow out when you set the lever of the faucet to the middle position. In standard mixers the continuous flow heaters or circulation pump start up immediately when in the middle position, which means wasted energy for heating up water, that you are not using. With Cold-Start or Cool-Start the piping system does not fill up unnecessarily with hot water.

    Here is a video that explains the CoolStart technology by Hansgrohe:

    As you can see there are many types of faucets out there for any prospective buyer to choose from. Deciding on a specific faucet for your bathroom should depend on what exactly you want to do with your bathroom, and how exactly you want it to look.

    Click here to browse our complete collection of bathroom faucets.

    Types of Bathroom FaucetsWhich type of Bathroom Faucets should I choose

  • Great Advice For Anyone Interested In Home Improvement

    Great Advice For Anyone Interested In Home Improvement

    Great Advice For Anyone Interested In Home ImprovementThe art of home improvement is so much more than just putting in a new sink. It takes a great deal of research, a lot of hard work, and careful attention to detail to really make sure that things look nice and that they are safely installed. The home improvement tips below can help you improve your home improvement skills as well as the value of your home for resale.

    Location and Resale Value

    Pay attention to your location. If you live in an area where most homes have pools, then it is definitely a sound investment for your home. However, if you live in an area where having a pool really is not feasible, such as North Dakota or Alaska, ask yourself if it is really worth it to have something you will not be using that often.

    If you can’t recoup at least 75 percent of the cost when you sell, you should consider the advantages of investing in some other features and improving parts with higher resale value. On average, you should recoup 92% on what you spend, according to Remodeling magazine. To achieve that a good rule of thumb is to spend less than 15 percent of your home’s market value.

    Work your way down

    Think about whether to start at the top or the bottom for your home-improvement project. The inclination may always be to start at the bottom, but in some cases, it is smarter to start at the top and work your way down if you’re going to be replacing the floors anyway.

    Communicate and designate working times

    An inside home improvement project may seem bothersome to those that dwell in the home. The best way to go about this would be to work on your project at designated times or when no one’s around. You don’t want to put all that added stress on yourself when you’re already working hard enough!

    Always communicate with anyone that shares responsibility for the project, whether it is a business partner or a spouse. Understanding what the project consists of right from the start by ensuring everyone knows their roles, helps eliminate finger pointing when something isn’t done on time during the project. Ultimately, it takes the pressure off you because you have a clear idea of what areas are your responsibility.

    Install a Steam Shower

    If you are renovating your bathroom, consider installing a steam shower. Steam showers have many health benefits, as well as being more comfortable to use than a standard shower. Steam showers are great after exercise, to soothe tired muscles, or for people with asthma and other breathing difficulties. There are even steam shower products that can be added to your current shower unit.

    How to preserve your drywall when removing cabinets

    Folding Utility Knife SetWhen removing cabinets as part of a kitchen remodel, make sure you don’t just unscrew and yank them off the wall. You will more than likely end up taking some or all of the drywall off with you. Take time and care to remove each and every screw, and use a utility knife around the edges to break the caulking that was most likely used to seal between the cabinet and the wall.

    A quick tip for finding studs

    Look for the line of nails! If you need to snug up a protruding piece of paneling or drywall you can normally tell where to add a new nail or screw just by closely observing the surface of the panel. It was installed by nailing it to the underlying wall studs and evidence of those studs will likely still be visible.

    The art of home improvement is something that can be enjoyed by nearly everyone, but only those very serious will try to perfect their home like a true professional. Now with more home improvement knowledge to add to your “bag of tricks,” you can easily become a great home improver too.

    Advice For Home Improvement

  • 10 Points You Should Ask Your Contractor About

    10 Points You Should Ask Your Contractor About

    There is such a high number of horrible home improvements that countless television shows are devoted to rectifying the errors and blunders. If you think working with a professional will prevent all disasters and you can simply hand over the improvement to him and he’ll look after it, you’re not only wrong but also another home-disaster program episode waiting to happen.

    A house improvement isn’t a task to pass on; it’s a task to manage. We tell you the 10 most important points you need to ask your contractor about upfront, between and all the way through the renovation process.

    10 Points You Should Ask Your Contractor

    So, where do you start?

    Right here are 10 points your service provider won’t tell you but which you definitely require to recognize prior to beginning with your restoration project.

    1) Your Contractor is NOT going to go to your house every day.

    Certain, this restoration is a big deal to you, however, for your specialist, it’s simply another task.

    “Professionals juggle work – it’s simply part of the formula,” says Herbert Belfort, a home-renovation pro. “They require to have numerous tasks going to stay afloat,” he said, which implies that they’re almost definitely NOT mosting likely to exist daily.

    You have to accept this as fact, however what you don’t have to accept is a lack of communications, Belfort claimed.

    ” They won’t tell you these things, because it makes property owners worried,” Belfort claimed.

    So, just see to it you remain on top of them and know what days they’re mosting likely to remain in your house, the number of people they’re bringing as well as what they’re doing.

    2) I recognize you’re the one paying, however my loyalties lie with that grimy person I simply allow into your home.

    When you hire a lawyer, personal fitness instructor or basic specialist you assume, “That’s my guy. He works for me. He’s keeping an eye out for my benefit.”

    When it comes to a basic service provider, sorry to tell you– he’s not watching out for you. He’s doing his work.

    “Unless the errors are ostentatious and also genuinely in-your-face, the majority of basic contractors’ obligation often tends to be in the direction of his professions and also subcontractors,” claimed Mary Chambers, an interior developer.

    “They’re in a cooperative connection (I hesitate to state a fellowship of burglars, since there are lots of excellent as well as truthful service providers out there!), and also each directly depends upon the other to earn a living, 24/7/365/ years on end,” Chambers discusses. “Regrettably, as the client, you’re the odd man out.”

    3) I’m a Jack of All Trades– yet a master of none.

    You have to ask your professional exactly how he plans to perform your renovation– is he doing it all himself or working with subcontractors?

    You may be inclined to assume that having one individual do it all is far better– you’ve currently fulfilled him and also vetted him, plus it’s more affordable to have one individual as opposed to 10, right? Not necessarily.

    ” Lots of guys are a Jack of All Trades– yet a master of none,” said Reginald Holm, the chief operations manager in the house Builders Team in Austin Texas.

    ” That’s when you can face problems,” Holm claimed. “You’re speaking about a capability … The majority of individuals are possibly fluent in a trade or two however possibly not so well versed in all of them,” he stated.

    With plumbers and also electricians, for instance, you’re probably better off getting someone certified.

    ” Never stint these 2 golden professions,” Chambers claimed. “As well as make certain you see your basic professionals’ subcontractors’ licenses”– he might show you his, yet it’s additionally crucial to see all the licenses of individuals dealing with your residence.

    10 Points You Should Ask Your Contractor Now

    4) I have a police record in 3 states.

    It’s very easy to examine a physician’s credentials– Opportunities are, he remains in your insurance network. And also, when you walk into his workplace, you’ll see his level on the wall surface. Yet exactly how do you understand if your professional is accredited and also insured, or if he has poor credit report and a criminal record in 3 states? You do not. Due to the fact that you’re not walking right into his workplace– he’s strolling into YOUR house. Prior to you unlock, you must examine to see to it he’s accredited and request for proof of insurance for him– as well as any type of subcontractors.

    And also, figure out if your specialist is bonded. If they’re bound and also stop working to complete your job, you’re covered for approximately $12,500. If they’re not– you’re out of luck.

    As well as you’re mosting likely to want a duplicate of the lien launches for any subcontractors he’s using. This way, if he determines to not pay them– they’re not mosting likely to place a lien on your residence.

    Marc Usher, CEO of a Construction business in San Francisco also encourages investing the additional $75 to run a credit report look at a future service provider. “If hey have a background of not paying their expenses or do refrain so in a prompt basis, this need to increase a warning,” Usher states. And that could be the best $75 you ever before invested.

    The National Organization of Homebuilders has a searchable supervisor of specialist remodelers at http://www.nahb.org/remodel.

    Plus, contact your state’s specialist permit board. Either Google your state + contractor license board– or utilize a site such as this: http://www.contractors-license.org.

    Chambers includes that if a contractor knocks on your door, stating he observed something you may require done and also below’s his number– maybe a scam. Ask him to send you an estimate in creating, and check his credentials before you call him back.

    5) You most likely need to’ve selected the various other man.

    With remodeling, you obtain what you pay for. So, the cheapest person isn’t constantly the best individual.

    ” If you obtain 3 quotes– you may want to look hardest at the center person,” Chambers said. “It’s not to state being the low man or high guy invalidates you– simply that you require to ask a few more questions. If you’re the low person– what did you exclude or do differently from my other 2 guys?” he stated.

    Jeff Retzack would certainly be so thrilled to hear that often, the middle is the very best!

    I’M JUST BELOW TO MAKE IT PRETTY

    6) I’m simply below to make it quite.

    OK, time for some tough love. Somebody needs to inform you that your service provider–.

    Is.

    Not.

    A.

    Designer.

    Most service providers aren’t going tell you that you could obtain an additional foot of space if you just curved a pipeline and also ran it in another direction, or that they can making your new floor covering flush with the old flooring with a little added job, claims Jessica Red, an interior designer from New York.

    They simply want to make all of your cherry wood and also marbled granite desires come true, take your cash as well as move on to the following task swiftly.

    So, you either need to employ a designer– also for a consultation– or start thinking like a developer and also insisting that your specialist perform your vision.

    Part of it is idleness however it’s likewise cash.

    ” These are the important things that add expenses,” Chambers describes. “A lot of professionals are afraid to include expenses to a job.”.

    As well as keep in mind: They’re not in the hand-holding organisation. Developers are. A developer will claim to you: “Just how do you intend to transform your space? What is very important to you– open idea? Additional storage space?”.

    If your contractor scratches his chest and claims, “What is essential to you, darling?”– you ‘d much better squeeze yourself, because you’re most likely fantasizing!

    7) Let’s talk trash.

    It’s simple to obtain delighted regarding paint colors, unique timbers and granite countertops once you toenail all of those points down, you have actually still obtained a long listing of points to talk about– as well as it’s not pretty.

    Points like: What are the working hrs (will they contravene when your child is resting?), when is it ALRIGHT to use the noisy tools, who’s going to tidy up all the dust, that’s mosting likely to obtain the garbage, what are the regulations of consuming, alcohol consumption and also cigarette smoking on duty, etc

    . If professional An undergoes all the information of the job and afterwards says “OK, allow’s discuss trash and dirt as well as working hrs,” but professional B does not, it’s easy to claim, “Perhaps I would certainly much better go with B … he wasn’t as unfavorable. He left me with a much better sensation,” Chambers stated. “Yet perhaps it would be better to opt for A … rather than B,” that was just saying what you intended to hear to obtain the job, he clarified.

    8) You don’t need a heater that large.

    It occurs regularly– you need a new furnace, however know nothing regarding furnaces. So, you contact a specialist and delegate the task to him.

    Well, here’s the truth: professionals often put in heating systems that are 50 percent to 300 percent larger than the home actually needs, states Howard Trent, a House Power Specialist from Chicago.

    ” The factor? They don’t desire you calling them back and having to go back out there,” Chambers claimed.

    ” Every house has an energy tons– an amount to keep you warm in the winter months and cool in the summertime,” he clarifies. “If you get one too large, you’re squandering a lot of energy … essentially, squandering a much bigger engine that your residence does not need, which maintains it from running effectively.”.

    The solution is to have your home checked to learn specifically what your energy tons is– and make sure you get a heater that’s neither too big, nor also small– yet perfect.

    9) Believe me, you don’t desire stainless steel.

    OK, so we all concur stainless-steel is quite and that’s what customers want. And at the end of the day, your contractor is here to provide you every little thing you desire– like stainless steel. (See additionally, “No. 6: I’m just right here to make it quite.”).

    However it’s your job to identify what’s useful for you– not just what’s popular.

    Chambers and also her hubby recently had their kitchen area renovated. And, while she sings the praises of her developer, she regrets that her designer suggested a stainless-steel dish washer.

    “OK, she’s young, she has no children. Did I say no children?” Chambers wrote on her blog. “How many dented stainless-steel dishwashers have you seen in your buddy’s kitchen areas?” she quipped.

    “Regrettably, many cooking area designers, unless they have kids of their own, won’t see that their once-pristine dishwashing machines are now nicked by toddlers that fling themselves at full throttle right into their shiny surfaces.”.

    As well as, all the fingerprints.

    ” I can tell who opened it by where the handprints are!” she joked.

    That’s not to claim you can’t still get stainless-steel devices, simply that you may intend to think about investing the additional money to have cabinet surface areas mounted on top of the home appliances. It’s not just aesthetic– It’s even more sturdy and immune to toddler-flinging antics!

    10) If you pay me too much up front, I’ll leave prior to the work’s done– or burglarize you blind.

    OK, now you recognize that home renovations constantly set you back at least 10 percent greater than you allocated. But what you might not realize is– if you pay him way too much in advance, he’s not mosting likely to complete the work.

    ” A great deal of people pay as they set up points,” Chambers said. “Yet consider it: If you’re doing a kitchen area, the cupboards are 90 percent of your price. When they install the cabinets, you have actually just paid mostly all of your bill,” she explained. “You might owe $100 at the end of the task– that’s to say they’ll return?”.

    Chambers suggests that you make a “punch list” of points that have to obtain done. When the penultimate 20 percent payment schedules, it must be contingent on round among your strike list being finished, she claimed. The final 10 percent should be paid just after the last punch checklist is finished.

    Likewise, you need to check in your agreement just how much your specialist will certainly bill you for any type of change orders– points you determine to add as you go along.

    “Discuss the labor per-hour price of those adjustments” beforehand, suggests Bruce Gregory. In this way, if you state it’s mosting likely to be $30 an hour for labor fees for additional work, this way he can’t bill you $40 or $50 or $60. And also, put a cap on materials, Gregory claims. Otherwise, you’ll for life be choking on your own craze throughout home excursions for loved ones, when you explain your $10,000 sink!

    “Do not get drawn right into paying as you go,” Gregory said. Figure it out ahead of time.

    Or else, your restoration will certainly be one huge string of profanity-laced tirades, instead of the stunning granite-topped improvement you visualize it to be.

    10 Questions You Should Ask Your Contractor